Tag: Daily Bonuses

High School DxD Female Characters Main Cast And...
The iconic anime and light novel series High School DxD has captivated fans worldwide through its rich supernatural lore and memorable cast. At the heart of its story are the distinct female leads who drive the narrative forward through their unique abilities, complex backgrounds, and strong interpersonal relationships. Understanding the primary heroines provides valuable insight into how the series balances action, comedy, and fantasy world-building.
The Leaders and Key Figures of the Gremory Peerage
Rias Gremory stands as the central heroine and the leader of the Occult Research Club. Known as the Crimson-Haired Ruin Princess, she is a high-ranking devil heiress possessing incredible destruction magic. Her authoritative yet compassionate nature allows her to guide her allies through high-stakes battles.
Akeno Himejima serves as Rias's loyal Queen and second-in-command within the peerage. As a hybrid fallen angel and devil, she wields devastating holy lightning abilities in combat. Her gentle demeanor often masks a fierce determination whenever her friends face danger.
Sacred Gear Users and Holy Warriors
Asia Argento plays a vital role in the group as a former sister with a rare healing Sacred Gear. Her gentle heart and unwavering loyalty make her an emotional cornerstone for the main cast. Despite her fragile appearance, her support powers frequently turn the tide of dangerous encounters.
Xenovia Quarta and Irina Shido bring formidable swordsmanship and holy weapons to the team's arsenal. Xenovia's direct combat style pairs effectively with Irina's divine background and versatile agility. Together, they represent the complex intersection between holy factions and devil alliances within the overarching lore.
Strategic Allies and Student Council Members
Koneko Toujou provides heavy physical offense as the peerage's resident Rook. Beneath her quiet and stoic exterior lies a powerful nekomata capable of utilizing senjutsu techniques. Her character arc explores overcoming past trauma to embrace her true heritage.
Sona Sitri operates as the intelligent President of the Kuoh Academy Student Council and head of her own devil team. Utilizing calculated strategies and water-based magic, Sona represents a tactical counterpart to Rias's direct power. Her ambition to establish fair educational opportunities for all devils adds political depth to the series.
Character Progression and Narrative Significance
Each female protagonist in High School DxD contributes substantially to the overall progression of the story arc. Rather than remaining static tropes, these characters undergo meaningful growth through shared trials and emotional challenges. Their evolving dynamics keep the narrative engaging across multiple seasons and light novel volumes.
The diverse cast of heroines remains one of the primary reasons for the franchise's enduring popularity. By combining distinct combat roles with deep personal backstories, the series delivers a well-rounded experience for fans of fantasy storytelling. Exploring their individual profiles highlights why these characters continue to resonate within the anime community.

How To Mod Steam Games Safely And Manage...
Modding PC games through Steam allows players to unlock incredible new content, graphical upgrades, and customized gameplay experiences. However, installing third-party files can sometimes cause technical instability, game crashes, or corrupted saves if done improperly. Learning how to mod Steam games safely ensures you can enjoy community creations without risking your core game files.
Utilizing the Steam Workshop for Safe Installations
The most straightforward method for modifying supported titles is through the built-in Steam Workshop. This feature allows players to browse, subscribe to, and automatically install mods with a single click. Because files hosted on the Steam Workshop undergo platform verification, they carry significantly lower risks than manual file downloads.
Managing your subscribed items is equally convenient within the Steam ecosystem. Unsubscribing from a mod through the game's Workshop hub will automatically prompt Steam to remove the files during the next sync. This streamlined process prevents leftover files from interfering with future game updates.
Sourcing Third-Party Mods from Trusted Platforms
When customizing games that lack native Workshop support, downloading files from established modding communities is essential. Reputable sites feature active user bases, moderation teams, and feedback sections where players report potential bugs or malware. Reading recent user comments before downloading any external archive helps ensure the file is safe to use.
Always verify file extensions and avoid executable files unless they originate from known tool creators. Running updated antivirus software provides an additional layer of protection when extracting compressed archives into your game directory. Taking these precautions protects both your personal device and your gaming profile.
Creating Backups and Maintaining Clean Directories
Before installing any manual modifications, creating a complete backup of your game's original files is a crucial step. Having a clean copy of the base directory allows you to restore functionality quickly if a mod breaks the game. You can easily duplicate the essential folders within the Steamapps common directory.
Additionally, backing up your saved game files regularly protects hours of progress from corruption. Many modifications alter game scripts permanently, which can render older saves unusable if the mod is removed later. Storing safety backups in a separate folder keeps your progress secure.
Using Dedicated Mod Managers for Organization
As your collection of custom content expands, using specialized mod management software helps prevent file conflicts. Popular tools organize installation orders, isolate files from the root folder, and allow users to toggle specific modifications on or off easily. This virtual approach keeps your primary game installation clean and organized.
Mod managers also monitor load orders to ensure scripts execute in the correct sequence. If a game fails to launch after installing new content, these managers make it simple to isolate and disable the problematic file without reinstalling the entire game.

I Love You Anime GIF Popular Romantic Reactions...
Anime GIFs have become a universal language for expressing deep affection and playful romance across digital platforms. Their expressive art styles, vibrant animations, and intense character emotions make them far more impactful than simple text messages. Whether you are sending a subtle blush or an explosive declaration of love, these animated clips capture sentiments that words often fail to convey.
The Evolution of Expressing Love Through Anime GIFs
Anime visual storytelling relies heavily on exaggerated character reactions to communicate complex inner feelings. From glowing eyes and dramatic blushes to floating hearts, these artistic tropes translate exceptionally well into short looping animations. Online communities frequently use these clips to add personality, humor, and genuine warmth to daily text conversations.
As digital messaging shifted toward visual communication, romantic anime snippets gained massive popularity across social media platforms. Users find that animated clips help bridge emotional distances in online friendships and relationships. Selecting the right animation allows individuals to share specific moods, whether tender, shy, or dramatically passionate.
Popular Types of Romantic Anime Reaction GIFs
The most widely shared romantic animations often feature iconic tropes like shy confessions, dramatic embraces, and sudden face-flushing blushes. Subtle moments, such as character pinky-holds or hesitant eye contact, appeal to users looking for gentle affection. Conversely, humorous clips featuring dramatic heart-burst reactions cater to over-the-top, playful declarations.
Popular romance series provide an endless supply of high-quality clips that fans instantly recognize. Scenes depicting warm hugs or forehead kisses are frequently clipped for daily affectionate check-ins between partners. These versatile animations allow senders to express affection in ways tailored precisely to their personal relationships.
Where to Find the Best Anime Romantic GIFs Online
Finding high-quality animated reaction clips is simple thanks to major GIF search engines and dedicated media repositories. Major database platforms host vast libraries categorized by character names, anime series, and specific emotional reactions. Utilizing precise search terms like affection, blush, or romantic embrace helps narrow down the most relevant animations quickly.
Social media networks like Pinterest, Tumblr, and specialized Discord communities are also rich sources for custom-edited animations. Fan creators often enhance original show clips with added aesthetic filters, soft lighting, or heart overlays to heighten romantic moods. Saving favorite finds directly to your device keyboard ensures quick access whenever a special moment arises during chat conversations.
How to Use Animated Reactions Effectively in Messaging
Timing and context play crucial roles when using expressive animated reactions in digital chats. Sending a heartwarming animation during a low-key conversation can provide an uplifting surprise to bright someone's day. Pairing a short textual note with an affectionate visual reaction creates a balanced and meaningful interaction.
It is helpful to consider the recipient's familiarity with anime aesthetics when choosing clips. Universally recognizable gestures, such as a cozy hug or a sweet smile, resonate well with almost anyone regardless of their interest in Japanese animation. Matching the energy of the animation to your dynamic ensures your affection comes across naturally and warmly.

Sons Of The Forest Console Command List and...
Sons of the Forest places players in a punishing wilderness filled with relentless threats and resource management challenges. Utilizing console commands allows players to bypass tedious survival grind, test gameplay mechanics, or freely build custom structures without limits. Understanding how to properly access and utilize these developer inputs can dramatically transform your survival experience on the island.
How to Enable and Access the Console Command Menu
Activating the debug console in Sons of the Forest is simple and requires no third-party software. Once loaded into a world, simply type the word cheatstick on your physical keyboard while unpaused. Pressing the F1 key immediately opens the full text prompt in the upper-left corner of your screen.
If the menu fails to appear, ensure your system language layout is set to standard English. Typing the word again usually resolves any initial detection errors. After the blinking text cursor appears, players can enter specific codes and execute them by hitting Enter.
Essential Player and Survival Commands
Survival cheats allow players to modify health, stamina, and basic physical attributes instantly. Entering godmode on gives complete invincibility while instantly maxing out hydration, fullness, and energy stats. Utilizing buffstats or regenhealth restores lost vitality without burning through precious healing items.
For players who prefer fast movement, typing speedyrun on significantly boosts movement speed across the map. You can also alter stats directly, such as using setstrengthlevel 100 to increase physical power and total health pools. Toggling invisible on or aighostplayer on makes you unseen to nearby hostiles.
Spawning Items and Managing Resources
Acquiring resources quickly is essential when constructing fortified bases against aggressive mutants. The command addallitems fills inventory slots with full stacks of every obtainable object in the game. If you only want story-related items, entering addallstoryitems delivers necessary progression tools directly to your bag.
Specific items can be generated using additem alongside the targeted object name or numerical ID. For instance, players looking for rapid building capabilities can use loghack on for infinite wood. If you want to check out similar gaming news and updates, feel free to visit for the latest insights.
Controlling the Environment and World Settings
Console commands offer direct influence over weather patterns, temporal cycles, and ecological conditions. Using season summer or season winter allows you to cycle through seasonal changes instantly. Adjusting the time of day is just as easy by executing settimeofday morning or settimeofday night.
To alter environmental visibility while exploring dark underground caves, enabling cavelight on provides steady illumination. You can also clear local wildlife using animalsenabled off or freeze aggressive entity logic using aipause on. These environmental controls offer total creative authority over your island domain.

How To Get Web Browser On PS5 Available...
Navigating the internet directly from a gaming console can be a convenient way to check walkthroughs or stream media without switching devices. Unlike its predecessor, the PlayStation 5 does not feature a dedicated internet browser app on its main dashboard. However, a hidden web browser exists within the console system interface, allowing users to surf the web through specific settings menus.
Accessing the Hidden Web Browser on PlayStation 5
To launch the built-in browser on your PS5, you must access it through the system account linking menu. Navigate to the console settings, select Users and Accounts, and choose the Linked Services tab. From there, select YouTube, click the Link button, and choose Use Browser on the following prompt.
Once the Google sign-in page appears on your screen, click on the Terms link at the bottom of the page. Scroll down to the footer and click the Google logo to open the main search page. You can now search for any web address or topic using the on-screen keyboard.
Understanding the Key Features and Capabilities
The hidden PS5 browser is capable of loading basic websites, reading articles, and executing JavaScript-based applications. It integrates smoothly with the DualSense controller, allowing smooth page scrolling and navigation using the analog sticks. Users can also utilize the console zoom feature in the accessibility menu to enlarge text and adjust visibility.
Major Limitations of the PS5 Browsing Experience
Because Sony did not design this feature as a standalone consumer app, it comes with several notable restrictions. There is no address bar, meaning you cannot type direct URLs and must rely entirely on search engine results. Additionally, the browser lacks support for bookmarks, browser extensions, tabs, and mouse navigation.
Media playback can also be inconsistent across complex websites, making standard dedicated apps a better option for video content. File downloads and local storage management through the browser interface remain strictly limited. Despite these constraints, the hidden tool remains useful for quick web searches during active gaming sessions.

Who Is The Villain In Justice League And...
The Justice League stands as DC Comics' most formidable superhero team, coming together to protect the universe from world-ending threats. Throughout comic book history and cinematic adaptations, these heroes face legendary antagonists capable of challenging their combined powers. Understanding who the villain in Justice League is depends largely on the specific storyline, as different eras feature distinct masterminds aiming for cosmic domination.
Steppenwolf and the Threat of Apokolips
In the feature films, Steppenwolf serves as the primary physical adversary who spearheads the invasion of Earth. Acting as a general for the cosmic tyrant Darkseid, his main objective is to locate and unite three powerful Mother Boxes. Uniting these alien relics allows him to terraform planets into barren landscapes resembling his homeworld.
Steppenwolf's role is crucial because his aggressive invasion forces humanity, Atlanteans, and Amazons to remember their ancient alliance. His overwhelming military strength forces Batman and Wonder Woman to recruit meta-humans, ultimately uniting the Justice League. Without his immediate threat, the iconic superhero team would not have formed when they did.
Darkseid as the Ultimate Mastermind
While generals like Steppenwolf handle ground invasions, Darkseid represents the overarching evil behind the greatest DC threat. Operating from the fire-pits of Apokolips, Darkseid seeks the Anti-Life Equation to erase free will across the entire multiverse. His role is that of a grand strategist who views entire worlds as simple pieces on a cosmic chessboard.
In extended cinematic cuts and classic comic arcs, Darkseid looms in the shadows as the ultimate threat waiting for the right moment to strike. His presence elevates the stakes from a local planetary invasion to a fight for existence itself. He remains the definitive antagonist against whom the superhero coalition measures its true strength.
Classic Comic Threats and Planetary Conquest
Before modern cinematic adaptations, the team defended Earth against iconic comic villains like Starro the Conqueror and Brainiac. Starro, a giant alien starfish, holds historical significance as the very first villain the team fought in comic book publication. His unique role involves spreading mind-controlling parasites, forcing heroes to fight their own brainwashed allies.
Other recurring adversaries like Lex Luthor and Vandal Savage organize villainous groups to counter the League's influence. These tactical geniuses rely on strategy, technology, and political manipulation rather than raw brute force. Their goal is often to dismantle the team from within by exploiting personal weaknesses and public distrust.
The Evolution of Justice League Antagonists
Over decades of storytelling, the role of a Justice League antagonist has evolved from simple invasion forces to complex narrative catalysts. Powerful cosmic entities force individual heroes to overcome personal differences and act as a unified tactical force. Understanding these dynamics provides deeper insight into why these epic battles remain central to modern mythology.

Where To Get The Fire Scorpion Charm In...
Finding specialized equipment is crucial for maximizing damage output when building a powerful pyromancy character in Elden Ring. The Fire Scorpion Charm is a powerful talisman designed specifically to boost fire-based attacks, making it a key item for targeted character setups. Locating it requires navigating through challenging volcanic terrain in the western region of the map.
Location of Fort Laiedd in Mt. Gelmir
The Fire Scorpion Charm is situated at Fort Laiedd, a heavily guarded fortress located in the western portion of Mt. Gelmir. To reach this area, players can travel through the Seethewater valley and head toward the Seethewater Terminus Site of Grace. The fort stands prominently at the end of the ravine path, surrounded by thermal geysers and hostile enemies.
How to Acquire the Fire Scorpion Charm
Once you arrive at Fort Laiedd, pass through the front entrance while avoiding or defeating the magma guards. Ascend the stairs to the upper ramparts of the fort to reach the outdoor walkways. The talisman is resting on a corpse located on a wooden catwalk hanging on the outer wall of the rampart.
Stats and Combat Trade-offs
Equipping the Fire Scorpion Charm increases all fire damage dealt by 12 percent in standard gameplay. However, this offensive bonus comes at a price, as it also increases physical damage received by 10 percent. Understanding these defensive trade-offs helps players decide when to use this item during tough boss encounters.
Best Character Builds for the Talisman
This charm works exceptionally well with Incantations like Catch Flame or Flame, Grant Me Strength, as well as weapons infused with Fire or Flame Art Ashes of War. Combining this item with other damage-boosting gear allows players to achieve massive burst damage against fire-vulnerable foes. Balancing armor weight and defensive buffs can mitigate the extra physical damage taken.

How To Get Warped Bone MHW Locations And...
Gathering crafting materials in Monster Hunter World is essential for upgrading your gear and forging powerful weapons. Among the various bone resources found throughout the New World, the Warped Bone is a rare drops item crucial for many mid-game armor sets and weapon trees. Understanding where to search and how to optimize your gathering routes will save you a lot of time during your hunting expeditions.
Primary Locations for Warped Bone Farming
The main habitat for finding Warped Bones is the Rotten Vale, a region filled with decaying monster remains and vast bone piles. Players can locate bonepiles scattered across various sectors, particularly in areas 1, 2, 4, and 5. Searching these specific zones gives you the highest chance of harvesting Warped Bones during lower and higher rank expeditions.
While exploring the lower levels of the Rotten Vale, equip gear that offers environmental protection against the toxic effluvium mist. This ensures your health remains intact while running between gathering nodes across the map. Concentrating on high-density bonepile routes will dramatically increase your gathering output per run.
Best Methods to Maximize Bone Drops
To increase your chances of obtaining rare materials, consider equipping armor pieces that grant the Geologist skill. This skill allows you to gather extra times from bonepiles before the node fully depletes. Additionally, utilizing the Master Gatherer skill speeds up the gathering animation, making your farming routes significantly faster.
Another effective strategy is to send out your Tailraider Safari to the Rotten Vale region. Setting your Palico squad to target bone gathering tasks often yields passive rewards upon their return, including rare bones. Combining active gathering expeditions with passive safari drops guarantees a steady supply for your crafting needs.
Alternative Ways to Acquire Warped Bones
Besides searching bonepiles, completing specific optional quests set in the Rotten Vale frequently rewards Warped Bones upon completion. Keep an eye on quest rewards that feature large monsters native to the area, such as Radobaan or Great Girros. Quest rewards often complement the materials you collect manually in the field.
High Rank investigations with bronze or silver reward boxes also offer an excellent secondary source for these rare items. Managing your active investigations at the Resource Center allows you to target quests with favorable drop rates. Taking on these short hunts provides a balanced mix of combat practice and resource collection.

How To Get Warped Bone MHW Locations And...
Gathering crafting materials in Monster Hunter World is essential for upgrading your gear and forging powerful weapons. Among the various bone resources found throughout the New World, the Warped Bone is a rare drops item crucial for many mid-game armor sets and weapon trees. Understanding where to search and how to optimize your gathering routes will save you a lot of time during your hunting expeditions.
Primary Locations for Warped Bone Farming
The main habitat for finding Warped Bones is the Rotten Vale, a region filled with decaying monster remains and vast bone piles. Players can locate bonepiles scattered across various sectors, particularly in areas 1, 2, 4, and 5. Searching these specific zones gives you the highest chance of harvesting Warped Bones during lower and higher rank expeditions.
While exploring the lower levels of the Rotten Vale, equip gear that offers environmental protection against the toxic effluvium mist. This ensures your health remains intact while running between gathering nodes across the map. Concentrating on high-density bonepile routes will dramatically increase your gathering output per run.
Best Methods to Maximize Bone Drops
To increase your chances of obtaining rare materials, consider equipping armor pieces that grant the Geologist skill. This skill allows you to gather extra times from bonepiles before the node fully depletes. Additionally, utilizing the Master Gatherer skill speeds up the gathering animation, making your farming routes significantly faster.
Another effective strategy is to send out your Tailraider Safari to the Rotten Vale region. Setting your Palico squad to target bone gathering tasks often yields passive rewards upon their return, including rare bones. Combining active gathering expeditions with passive safari drops guarantees a steady supply for your crafting needs.
Alternative Ways to Acquire Warped Bones
Besides searching bonepiles, completing specific optional quests set in the Rotten Vale frequently rewards Warped Bones upon completion. Keep an eye on quest rewards that feature large monsters native to the area, such as Radobaan or Great Girros. Quest rewards often complement the materials you collect manually in the field.
High Rank investigations with bronze or silver reward boxes also offer an excellent secondary source for these rare items. Managing your active investigations at the Resource Center allows you to target quests with favorable drop rates. Taking on these short hunts provides a balanced mix of combat practice and resource collection.

Where To Find Ancient Core Dreamlight Valley And...
Disney Dreamlight Valley introduces various specialized resources through its expansion content, with Ancient Cores being among the most valuable items for crafting automated machinery. Players looking to streamline daily tasks such as gardening, cooking, and foraging will need a steady supply of these rare components. Understanding where these cores spawn and how to efficiently harvest them is essential for expanding your valley's infrastructure.
Unlocking the Royal Hourglass for Timebending
To start collecting Ancient Cores, players must first acquire and unlock the Royal Hourglass tool. This tool allows you to perform timebending activities across both Eternity Isle and the original Dreamlight Valley biomes. Upgrading the Royal Hourglass at a timebending station unlocks higher tiers of Ancient Cores required for advanced recipes.
Best Locations for Finding Ancient Cores
Ancient Cores can be discovered by using the Royal Hourglass in any biome across the main valley and Eternity Isle. While many players focus their search exclusively on Eternity Isle, exploring the original biomes in Dreamlight Valley often yields remarkably consistent results.
Additionally, participating in timebending treasure circles that appear randomly in the world increases your overall chances of finding them. Checking diverse regions regularly prevents search fatigue and ensures continuous node spawns.
Strategies to Increase Ancient Core Yields
Bringing along a villager assigned to the Timebending role significantly boosts your resource output during hunts. When your companion accompanies you, they have a reliable chance to duplicate any Ancient Core you unearth. Managing your hourglass upgrade levels carefully ensures you continue generating the specific core tiers needed for your current projects.
Players can also open hidden treasure chests scattered across expansion zones to acquire additional cores. Consistently clearing obstacles and sweeping every unlocked biome optimizes your chances during long hunting sessions.

GTA 5 Performance Vs Performance RT Graphics And...
Grand Theft Auto V on modern consoles offers players multiple visual presets to balance graphical fidelity with smooth frame rates. Choosing between Performance Mode and Performance RT Mode can significantly impact your gameplay experience depending on your preferences. Understanding these options helps you decide which setting delivers the ideal balance for your gaming setup.
Visual Quality and Rendering Resolution
Performance Mode focuses on maintaining a smooth frame rate by targeting a dynamic resolution up to 1440p on current-generation hardware. This mode turns off hardware-accelerated ray tracing to ensure consistent rendering performance across intense gameplay scenarios. As a result, shadows and lighting rely on traditional rasterization techniques that keep the image crisp and steady.
Performance RT Mode introduces ray-traced shadows while maintaining the target 60 frames per second experience. The resolution remains dynamic around 1440p, but ambient lighting and shadow fidelity receive noticeable enhancements. Players will notice subtle improvements in real-time shadow casting beneath vehicles, foliage, and urban structures.
Frame Rate Stability and Gameplay Smoothness
When comparing frame rates, standard Performance Mode provides the most consistent 60 FPS output during heavy action. Explosions, intense high-speed chases, and crowded street intersections show fewer frame drops under this setting. It offers the lowest input latency for competitive online sessions where responsiveness matters most.
Performance RT Mode manages to maintain a fluid 60 FPS target during most driving and exploration sequences. However, slight frame rate dips can occasionally occur during chaotic moments with heavy particle effects. Most players find these minor fluctuations imperceptible during regular story progression and free-roam activities.
Ray Tracing Impact on World Immersion
Ray tracing in Grand Theft Auto V primarily enhances environmental lighting and directional shadows rather than full reflections. The subtle contact shadows cast under street lamps and vehicles give Los Santos a more grounded and realistic atmosphere. This visual upgrade adds depth to daytime scenery without drastically altering the core aesthetic.
Without ray tracing active, standard Performance Mode features brighter, flatter lighting in certain outdoor environments. While the difference is modest, side-by-side comparisons highlight how Ray Tracing improves depth perception in city alleys and forested areas. Choosing this setting relies on whether you prefer slight visual extra polish over absolute performance consistency.
Which Graphics Mode Should You Choose?
For players who prioritize competitive responsiveness and rock-solid frame rates, standard Performance Mode remains the top selection. It provides smooth driving dynamics and snappy aiming controls across all mission types. This mode guarantees that frame drops remain extremely rare regardless of action density.
Players seeking the optimal middle ground between next-gen visual upgrades and fluid motion should select Performance RT Mode. It brings modern lighting enhancements to Los Santos while maintaining the high responsiveness of 60 FPS gameplay. Evaluating your display setup and personal preference will help you enjoy Grand Theft Auto V at its absolute best.

What Do Odds Mean in Betting Horse Racing...
Understanding horse racing odds is essential for anyone wanting to participate in trackside or online wagering. Odds reflect the probability of a horse winning a race and determine the prospective financial payout for a successful bet. By learning how these numbers are calculated and displayed, racegoers can evaluate risk and make more informed decisions.
The Fundamental Concept of Horse Racing Odds
At their core, odds represent the ratio between the stake placed on a horse and the expected profit returned. A horse with lower numbers is considered a favorite, meaning oddsmakers believe it has a higher chance of victory. Conversely, higher odds signify an underdog with a lower statistical probability of winning but a larger potential return.
These figures are determined by a combination of statistical modeling, handicapping analysis, and public betting activity. As more money is placed on a specific horse, its payout ratio decreases accordingly. Understanding this dynamic helps bettors spot valuable opportunities before prices shift right before post time.
How Fractional Odds Work on the Track
Fractional odds are the traditional format used in horse racing, displayed as two numbers separated by a slash such as 5/1 or 7/2. The right number indicates the amount you must wager, while the left number represents the potential profit earned. For instance, a $1 bet on a horse with 5/1 odds yields $5 in profit plus your original stake back.
When the first number is smaller than the second, such as 2/5, the horse is heavily favored and referred to as an odds-on favorite. In this scenario, you must stake $5 to win a profit of $2. Modern platforms like m88 allow users to convert these traditional fractional displays into decimal or American formats for easier calculation.
Reading Decimal Odds and Implied Probability
Decimal odds present the total payout directly, including the original wager, which simplifies calculating returns for international racing markets. For example, odds of 6.00 mean that a $10 bet returns $60 total, consisting of $50 profit and the $10 stake. This format makes comparing different runners across complex race cards straightforward.
Bettors can also convert any set of odds into implied probability to evaluate whether a line offers true value. Dividing the total stake by the total return reveals the exact mathematical percentage chance assigned to that horse. If your personal analysis suggests a runner has a better chance than the implied probability indicates, that bet holds value.
Factors That Cause Betting Lines to Shift
Horse racing odds are dynamic and constantly adjust until the starting gate opens based on the pari-mutuel pool. Key factors influencing movement include sudden track condition changes, late weather shifts, jockey changes, and heavy wagering volume. Watching the tote board for drastic price drops often highlights horses attracting sharp market interest.
Evaluating race history, trainer statistics, and track bias alongside shifting numbers gives handicappers a comprehensive overview. By mastering how to read odds accurately, enthusiasts can navigate racing markets with confidence and maintain a disciplined betting strategy.
Revenge Of The Sith Timeline Complete Chronology Of...
Star Wars Episode III: Revenge of the Sith marks the dramatic climax of the prequel trilogy, serving as a pivotal bridge between the Republic era and the rise of the Galactic Empire. Set in 19 BBY (Before the Battle of Yavin), the film chronicles the rapid downfall of the Jedi Order and the birth of Darth Vader. Understanding the precise sequence of events helps fans appreciate how years of political manipulation culminated in a single catastrophic shift for the galaxy.
The Final Battles of the Clone Wars
The story opens during the chaotic Battle of Coruscant, where Jedi Knights Anakin Skywalker and Obi-Wan Kenobi execute a daring rescue mission to save Supreme Chancellor Palpatine. This opening sequence highlights Anakin's growing formidable power and his willingness to cross moral boundaries when he executes Count Dooku under Palpatine's persuasion. Dooku's death effectively weakens the Separatist leadership and accelerates the war toward its deceptive conclusion.
Shortly after returning to Coruscant, Anakin learns of Padmé Amidala's pregnancy, which triggers severe prophetic visions of her death in childbirth. Driven by desperation to prevent this fate, Anakin becomes increasingly receptive to Palpatine's subtle promises of dark side powers that can conquer death. Meanwhile, Obi-Wan travels to Utapau to track down General Grievous, the remaining leader of the Separatist droid army.
The Fall of the Jedi Order and Order 66
The turning point of the galactic timeline occurs when Palpatine reveals his true identity as the Sith Lord Darth Sidious to Anakin. Although Anakin initially reports this revelation to Mace Windu, his overwhelming fear of losing Padmé forces him to intervene during Windu's attempt to arrest the Chancellor. By aiding Palpatine in defeating Windu, Anakin pledges himself to the Sith and receives the name Darth Vader.
Immediately following Anakin's pledge, Palpatine executes Order 66, a secret command embedded in the clone troopers' biochips that forces them to betray their Jedi commanders worldwide. Simultaneously, Darth Vader leads the 501st Legion in a devastating assault on the Jedi Temple on Coruscant, effectively wiping out the heart of the Jedi Order. Only a handful of Jedi, including Obi-Wan Kenobi and Grand Master Yoda, manage to survive the initial purge.
The Battle of Mustafar and the Rise of the Empire
Palpatine consolidates his political victory by declaring the transformation of the Galactic Republic into the First Galactic Empire during an extraordinary session of the Senate. To eliminate the remaining political pawns, Darth Vader is dispatched to the volcanic planet of Mustafar to execute the Separatist Council members. Padmé travels to Mustafar to confront her husband, unwittingly leading Obi-Wan straight to Vader's location.
The tragic confrontation between Obi-Wan and Darth Vader results in a fierce duel across Mustafar's lava rivers, ending with Vader suffering catastrophic injuries. Obi-Wan leaves his former apprentice for dead, allowing Palpatine to retrieve Vader and enclose him in his iconic black armor suit. At the same time, Padmé gives birth to Luke and Leia before passing away, prompting Yoda and Obi-Wan to hide the newborn twins to preserve the future hope of the galaxy.

How To Find Lost Follower Skyrim Complete Follower...
Navigating the province of Skyrim alongside a loyal companion makes combat encounters and dungeon exploration significantly easier. However, companions frequently vanish due to pathfinding glitches, aggressive terrain, or accidental wait commands left active in remote locations. Restoring your lost companion requires a structured approach utilizing basic fast travel tricks, waiting mechanics, or console commands on PC platforms.
Utilize Fast Travel and Waiting Mechanics
The simplest method to locate a missing companion involves using the fast travel feature to force the game engine to relocate your active ally. Traveling to a major city or open settlement causes active followers to instantly teleports to your side. If your companion was ordered to wait, fast traveling will not work until enough in-game time passes.
To reset waiting companions, rest or wait for three in-game days in a single location. After 72 hours, a system notification will inform you that your follower has grown tired of waiting and returned home. You can then travel back to their default home location or hire location to recruit them again.
Check Default Homes and Recruiting Spots
When companions are dismissed or lose patience, they automatically travel back to their designated home location. Housecrolls like Lydia return to Dragonsreach or your player home in Whiterun after leaving your service. Other followers recruited from taverns return to their original seats in those specific taverns.
Walking back to these primary hubs allows you to verify whether your companion is safely resting or still wandering the wilderness. If you cannot find them at home, they may be stuck in a slow walking animation across the overworld. Giving them a few additional days of in-game time usually allows them to navigate around terrain obstacles.
Use Console Commands on PC
PC players have access to developer commands that can instantly relocate any missing NPC. Opening the console and entering the RefID for your follower allows you to target them directly across the map. Executing the target command followed by moveto player instantly teleports your lost companion to your current position.
Alternatively, you can teleport your player character directly to the companion's current location using the player.moveto command. This is helpful for retrieving valuable items stored in their inventory if they become permanently stuck inside non-navigable dungeon geometry. Console commands offer a guaranteed fix when standard game mechanics fail.
Preventing Future Companion Losses
To prevent your allies from disappearing in future adventures, avoid giving wait commands on uneven surfaces or inside temporary quest dungeons. Keep an eye on your active follower count when accepting new story quests, as certain quests force your current companion to leave. Monitoring their health during hectic battles also ensures they are not downed permanently during dangerous encounters.

Where Is Wyrm's Rock Fortress BG3 Location And...
Wyrm's Rock Fortress stands as a central stronghold in Baldur's Gate 3, acting as the mandatory gateway between Rivington and the Lower City. Navigating into this heavily guarded castle can prove challenging due to raising drawbridges and patrolling Steel Watchers. Understanding the precise location and alternative entry routes allows players to progress smoothly through Act 3.
Locating Wyrm's Rock Fortress on the Map
Wyrm's Rock Fortress is positioned directly along the central path north of Rivington, spanning the chasm that separates the outer settlements from the main city gates. Players naturally encounter the structure after crossing Wyrm's Crossing and clearing initial checkpoints. The massive stone structure serves as both a military keep and the primary location for Enver Gortash's coronation.
Reaching the fortress perimeter is straightforward, but passing the main drawbridge requires administrative clearance or creative maneuvering. Guarded continuously by Flaming Fist mercenaries and mechanical sentries, the central entrance remains locked to unauthorized visitors. Identifying all available entry points prevents unnecessary combat encounters during your approach.
Obtaining Passes for Diplomatic Entry
The most direct method to gain entry is by acquiring an official Lower City Pass through various side quests in Rivington. Completing tasks such as investigating suspicious toys or solving murder mysteries at the Open Hand Temple yields legitimate documentation. Presenting these passes to the guard commander prompts them to lower the drawbridge immediately.
Alternatively, skilled party members can attempt persuasion or deception checks during dialogue with the bridge guards. Success grants immediate access to the audience hall for official business without engaging in hostility. Stealing a pass from key individuals around Sharess' Caress also serves as an effective option for stealthy parties.
Alternative Routes and Infiltration Methods
For players seeking to bypass guards entirely, the fortress features environmental entry routes around its base. Utilizing spells like Feather Fall allows characters to leap down onto the rocky cliffs surrounding the castle walls. From these lower ledges, players can discover pathways leading around the perimeter to hidden openings.
A notable breach in the outer masonry leads directly into the underground prison complex beneath the main keep. Navigating through this crack in the wall allows players to infiltrate the structure quietly while bypassing official security checkpoints. Teleportation abilities such as Dimension Door or Mister Step can also help individual characters reach higher balconies.
Navigating the Inner Chambers and Prison
Once inside Wyrm's Rock Fortress, players can access multiple floors including the main throne room and the subterranean dungeon levels. The upper levels house major narrative events, while the lower cells hold important captives and secrets tied to the city's ancient history. Managing your reputation inside the keep determines whether guards remain neutral or attack on sight.
Securing access to the internal Waypoint simplifies future traversal between Rivington and the Lower City districts. Whether arriving as an honored guest or an undetected intruder, mastering these access routes ensures flexible progression through the final chapter of your journey.

How To Make A Team In Rust Multiplayer...
Navigating the cutthroat world of Rust alone can be an intimidating challenge for even the most experienced survival enthusiasts. Joining forces with trusted allies drastically improves your chances of securing valuable loot and defending your hard-earned base. Learning how to form and manage a squad effectively is a vital step toward mastering the game's cooperative dynamics.
Creating and Inviting Members to Your Squad
To start a squad in Rust, open the in-game inventory menu and select the option to create a team. Once created, approach your ally in the game world, look directly at them, and hold the interaction key to bring up the context menu. Select the invite option to send a direct request to your prospective teammate.
Your friend must accept the invitation through their interface before they officially join your team roster. Once accepted, team members gain green name tags and map markers that allow for easy identification during fast-paced encounters. This shared HUD element prevents accidental friendly fire and keeps your group coordinated in intense combat.
Managing Team Limits and Server Rules
By default, official Rust servers allow a maximum team size of up to eight players per group. Server hosts can alter these limitations using specific administrative commands to create custom squad caps like duos or trios. It is essential to check individual server rules regarding group limits to avoid accidental bans.
The team leader maintains full control over the group roster and can kick inactive players when necessary. If a player leaves or gets removed from the squad, their status indicator immediately reverts back to neutral. Keeping a clean roster ensures that active members always have access to shared tactical information.
Base Access and Resource Sharing Tactics
Forming an in-game team does not automatically grant your teammates authorization to open locked doors or operate base defenses. Each player must individually authorize on the Tool Cupboard, enter door keycodes, and authorize on automated turrets. Setting up proper permissions prevents accidental lockouts and keeps base security tight.
To help scattered teammates meet up quickly across the expansive map, players can craft and place sleeping bags assigned directly to friends. Assigning a spawn point lets allies respawn right inside the safety of your compound. Coordinating bag placements and resource distribution turns a group of solo survivors into a formidable force.

How To Take A Screenshot On PS4 Complete...
Capturing memorable gaming moments on the PlayStation 4 is a simple process that allows players to save and share their favorite achievements. The DualShock 4 controller features dedicated hardware designed specifically to record high-resolution images instantly. Learning the various shortcut methods helps gamers preserve trophy unlocks, story milestones, and funny gameplay glitches without interrupting their sessions.
Using the Dedicated Share Button
The standard method for taking a picture involves pressing the Share button located on the top left side of your controller. A single quick press opens the Share menu, where you can instantly select the option to capture your screen. This feature works seamlessly across almost all digital titles and system applications.
Alternatively, holding down the Share button for a brief moment takes an immediate snapshot without opening any overlays. This default shortcut ensures that you capture fast-moving action scenes before the moment passes. The system displays a small camera icon in the top corner to confirm the image was saved.
Customizing Controller Sharing Settings
Players can alter how the Share button behaves by accessing the system settings menu to fit their personal preferences. Navigating to the Sharing and Broadcasts menu allows you to switch between the Standard and Easy Screenshot control types. Choosing Easy Screenshot allows you to take pictures with a single tap rather than holding the button.
Adjusting these operational parameters speeds up image capture during intense multiplayer matches. You can also configure the system to automatically save a picture whenever you unlock an achievement. Fine-tuning these controls provides a smooth experience tailored directly to your capture habits.
Managing and Exporting Saved Images
All captured images are organized automatically inside the console's local Capture Gallery application. From this interface, players can sort their media by specific game titles, date created, or favorite tags. You can view full-screen previews or delete unwanted captures to clear up system storage space.
Exporting images to external devices is straightforward by connecting a USB flash drive to the front ports. Selecting your desired files and choosing the Copy to USB Storage Device option transfers the media quickly. This makes it convenient to edit your gaming memories on a personal computer later.
Sharing Captures to External Platforms
Sharing your accomplishments with friends and online communities can be done directly from the system dashboard. Linking your social accounts allows you to upload media without leaving the game environment. You can also send images directly to other players through the internal messaging system.
Using mobile applications provides another flexible way to download your captured content to mobile devices. Sending your screenshots in a direct message allows you to access them easily on a smartphone. This method offers a seamless bridge between console gaming and mobile sharing.

Red Bricks Lego Batman 2 Complete Red Brick...
Unlocking special extras and cheats in LEGO Batman 2: DC Super Heroes requires finding hidden Red Bricks scattered across the open world. Throughout the vast hub of Gotham City, players can track down 20 distinct Red Bricks that grant powerful stud multipliers, character abilities, and helpful detectors. Knowing where to look and which abilities are needed makes collecting these valuable rewards much easier.
Exploring the Northern Island Red Bricks
The Northern Island contains several important Red Bricks hidden within iconic locations. Players will need specific villain characters like The Joker, The Riddler, and Lex Luthor to interact with specialized boxes and containers. For instance, heading to the Batcave with Lex Luthor allows you to deconstruct a special object to secure the Attract Studs brick.
Other collectibles in this region offer essential survival tools like Fall Rescue and Regenerate Hearts. Finding the Studs x8 brick requires using Lex Luthor's Deconstructor near the southeastern alcove of Northern Island. Utilizing these multipliers early helps generate the massive stud counts required to purchase late-game unlocks.
Uncovering Central Island Discoveries
Central Island holds a variety of utility features including detectors and score multipliers. Players exploring Gotham Zoo or Gotham Beach can open Riddler boxes to obtain the Extra Toggle and Gold Brick Finder items. For those looking to boost their overall progress, completing the remote control mini-games at the Power Station unlocks the Studs x2 brick.
Another notable extra is the Minikit Piece Finder, which requires operating remote control toy boats in Gotham Park to destroy enemy targets. Players aiming to maximize their score strategy can check out for expanded details on game mechanics and secrets. Tracking down these central collectibles ensures a smooth journey toward 100% completion.
Scouring Southern Island Secrets
Southern Island features some of the most potent Red Bricks in the game, including higher-tier score multipliers. Players can acquire Studs x4 by competing in the remote control car challenge located at the Police Station parking lot. Reaching the absolute maximum multiplier demands finding the Studs x10 brick near the southeastern coast using Lex Luthor.
In addition to financial boosts, Southern Island houses valuable utility items like Invincibility and Peril Finder. Opening Riddler boxes near landmarks such as City Hall, Wayne Tower, and Gotham Cathedral grants crucial advantages during difficult missions. Collecting every brick across all three islands fully upgrades your capabilities for open-world exploration.

Fallout New Vegas Stealth Build Best Skills Weapons...
Executing a stealth playthrough in Fallout New Vegas provides one of the most satisfying tactical experiences in Obsidian Entertainment's iconic RPG. By striking undetected from the shadows, players can land massive critical hit modifiers that eliminate formidable foes before combat officially begins. Mastering this covert playstyle requires a deep understanding of core SPECIAL attributes, key skill investments, tailored weapon selections, and game-changing perks.
Essential SPECIAL Stats and Core Skills
Building an effective shadow operative starts during character creation at Doc Mitchell's house in Goodsprings. Agility serves as the vital backbone of your character, increasing movement speed in stealth mode while granting crucial Action Points for VATS encounters. High Perception is equally important because it detects hostiles on your compass from substantial distances, allowing you to position yourself safely.
For skill point distribution, prioritize maxing out Sneak early to lower enemy detection thresholds significantly. Guns or Energy Weapons should serve as your primary offensive focus depending on your preferred arsenal. Additionally, investing points into Lockpick and Science opens hidden tactical routes around heavily fortified hostile outposts throughout the Mojave.
Top Silenced Weapons and Gear Selection
Choosing suppressed weaponry ensures you stay hidden even when opening fire in tight corridors or open encampments. The Suppressed 10mm Submachine Gun and Ratslayer rifle act as exceptional early-to-midgame options for quiet long-range snipes. Transitioning to Christine's COS Silencer Rifle provides unrivaled single-shot critical damage for endgame combat situations.
For close-quarters engagements, quiet sidearms like A Light Shining in Darkness or a silenced 12.5mm Pistol offer devastating burst output. Wearing lightweight armor such as the Assassin Suit or Joshua Graham's Armor keeps your noise detection level extremely low. Avoiding heavy power armor prevents unwanted movement sound penalties while maintaining maximum movement velocity.
Must-Have Perks for Maximum Stealth
Perk selection dictates how fluidly your stealth character scales into the late-game content. The Silent Running perk is mandatory because it allows your Courier to run quickly without alerting nearby guards. Pair this with Better Criticals to gain a massive fifty percent damage boost on every stealth attack attempt.
Finesse and Light Touch further increase your overall critical hit probability during unexpected open combat scenarios. For players who enjoy silent melee takedowns, Ninja offers substantial bonuses to critical strikes using unarmed or blade weapons. Combining these specific perks transforms your character into an unstoppable phantom scout.
Tactical Gameplay and Combat Strategies
Patience and environmental awareness are key to surviving tough encounters in open desert spaces or cramped vaults. Always observe enemy patrol paths and utilize high vantage points before initiating an ambush. Using item aids like Stealth Boys grants temporary invisibility during tight extractions or high-risk infiltrations.
Leveraging VATS allows for precise headshots that instantly eliminate guards without alerting surrounding reinforcements. Always maintain distance from aggressive mutated creatures like Deathclaws, as their perception stats remain high even against skilled stealth users. Careful preparation guarantees that your shadow sniper operates undetected across every major storyline faction.

Amazon Prime Day Gaming Laptop Deals And What...
Amazon Prime Day has evolved into one of the most anticipated shopping events for PC gamers seeking major discounts on high-performance hardware. Finding genuine value among thousands of listings requires understanding core hardware specifications and recognizing true price drops. Navigating these annual sales efficiently allows buyers to secure capable gaming rigs while avoiding outdated inventory.
Understanding GPU and CPU Performance Tiers
The graphics processing unit serves as the heart of any gaming laptop, determining how smoothly demanding titles run. During Prime Day, buyers will find options ranging from entry-level GPUs like the RTX 5050 to high-end configurations featuring the RTX 5070 Ti or RTX 5080. Pairing a capable GPU with a balanced processor ensures stable framerates without severe performance bottlenecks.
Modern gaming laptops rely heavily on multi-core processors from Intel and AMD to handle background tasks and complex game logic. Paying attention to generation markers helps distinguish current hardware from clearance stock that may struggle with upcoming releases. A well-balanced system yields a noticeably better gaming experience than a rig with mismatched components.
Evaluating Display Features and Refresh Rates
A fast graphics card requires a high-quality display panel to show off fast-paced gameplay effectively. Gamers should look for screens offering at least a 144Hz or 165Hz refresh rate for smooth visuals in action games. Resolution also plays a major role, as 1440p displays provide sharper images while 1080p panels remain easier on budget hardware.
Color accuracy and panel technology also impact daily enjoyment, especially for users who create content alongside gaming. IPS panels offer strong viewing angles, while newer OLED options deliver unmatched contrast ratios. Selecting the right display setup ensures your eyes stay comfortable during long gaming sessions.
Checking Thermal Design and Build Quality
High-end hardware produces significant heat, making cooling systems a vital consideration when shopping sales events. Laptops with robust heat pipes and multi-fan setups maintain peak performance without thermal throttling under heavy loads. Reading user reviews regarding chassis rigidity and keyboard thermal management helps prevent buyer's remorse.
Port selection and upgradeability also dictate how long a gaming laptop remains functional for your needs. Systems with accessible RAM slots and extra M.2 SSD bays allow easy expansion as storage demands grow over time. Investing in a sturdy chassis protects your component choices for years of travel and daily use.
Navigating Prime Day Discounts Smartly
Not every advertised discount represents a true bargain, as original prices are sometimes inflated prior to major shopping holidays. Comparing historical pricing across multiple retailers helps confirm whether a deal offers real savings. Focusing on total value rather than percentage markdowns ensures you land the best performance for your budget.

Games Like VRChat Without VR Best Social Games...
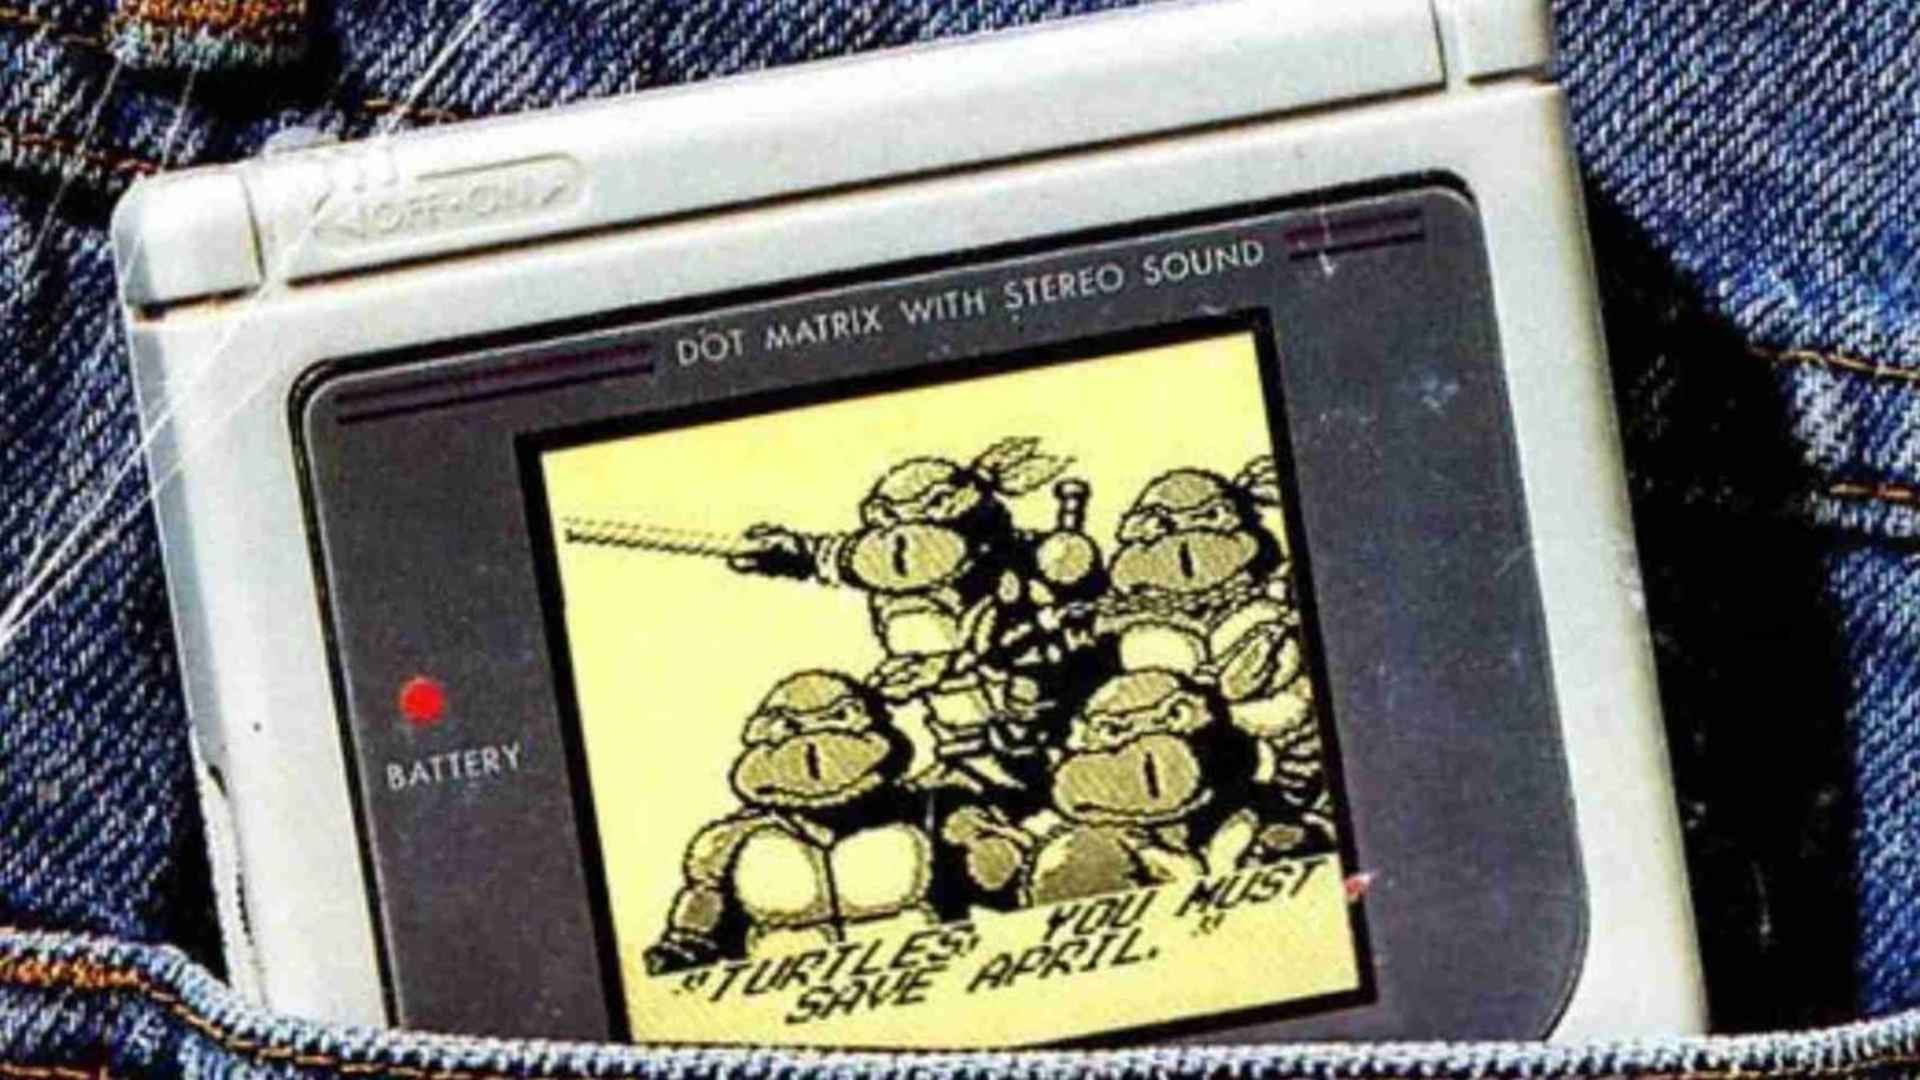
Finding immersive social spaces online does not require expensive virtual reality hardware. Many popular platforms offer rich multiplayer environments, avatar customization, and vibrant communities that run directly on standard desktop computers. Whether you are looking for creative sandboxes or casual hangout spots, there are plenty of options available.
Top Free Alternatives for Desktop Players
Rec Room stands out as one of the most accessible social games available today. It offers cross-platform support and features thousands of player-created mini-games ranging from paint-ball to custom escape rooms. Desktop users can seamlessly interact with others without feeling limited by the lack of a headset.
ChilloutVR provides another strong alternative that mirrors the core mechanics of traditional social VR platforms. It allows deep avatar customization and flexible world-building features for creative communities. Players on standard PC monitors can easily explore user-generated spaces and meet new friends.
Sandbox Games Focused on Social Interaction
Garry's Mod remains a timeless classic for gamers seeking open-ended multiplayer experiences. With custom roleplay servers, mini-games, and extensive modding support, it fosters strong social connections. Players can personalize their avatars and participate in endless community-driven activities.
Tower Unite offers a massive online virtual world filled with arcade games, custom housing, and social hubs. It functions as a dedicated virtual hangout spot without requiring any VR equipment. You can decorate your personal condo, host parties, and play games with friends in a relaxed environment.
Creative Worlds and Deep Customization
Resonite delivers an advanced creation platform where players build worlds and avatars in real-time. While it supports VR headsets, its desktop mode provides full access to its deep social and building systems. It is ideal for players who enjoy collaborating on technical and creative projects.
Platforms like IMVU offer classic avatar-based chat environments centered around fashion and personal spaces. These games prioritize desktop accessibility, allowing users to customize 3D avatars and socialize in styled rooms. They offer a structured social experience for those who prefer casual chatting over complex gameplay mechanics.
Choosing the Right Social Platform for You
Selecting the best alternative depends on whether you prefer active mini-games, deep creative tools, or simple hangout spaces. Trying out free options allows you to explore different communities and find the environment that best fits your playstyle. Modern desktop social games ensure that everyone can participate in virtual communities without extra hardware costs.
Games Like VRChat Without VR Best Social Games...
Finding immersive social spaces online does not require expensive virtual reality hardware. Many popular platforms offer rich multiplayer environments, avatar customization, and vibrant communities that run directly on standard desktop computers. Whether you are looking for creative sandboxes or casual hangout spots, there are plenty of options available.
Top Free Alternatives for Desktop Players
Rec Room stands out as one of the most accessible social games available today. It offers cross-platform support and features thousands of player-created mini-games ranging from paint-ball to custom escape rooms. Desktop users can seamlessly interact with others without feeling limited by the lack of a headset.
ChilloutVR provides another strong alternative that mirrors the core mechanics of traditional social VR platforms. It allows deep avatar customization and flexible world-building features for creative communities. Players on standard PC monitors can easily explore user-generated spaces and meet new friends.
Sandbox Games Focused on Social Interaction
Garry's Mod remains a timeless classic for gamers seeking open-ended multiplayer experiences. With custom roleplay servers, mini-games, and extensive modding support, it fosters strong social connections. Players can personalize their avatars and participate in endless community-driven activities.
Tower Unite offers a massive online virtual world filled with arcade games, custom housing, and social hubs. It functions as a dedicated virtual hangout spot without requiring any VR equipment. You can decorate your personal condo, host parties, and play games with friends in a relaxed environment.
Creative Worlds and Deep Customization
Resonite delivers an advanced creation platform where players build worlds and avatars in real-time. While it supports VR headsets, its desktop mode provides full access to its deep social and building systems. It is ideal for players who enjoy collaborating on technical and creative projects.
Platforms like IMVU offer classic avatar-based chat environments centered around fashion and personal spaces. These games prioritize desktop accessibility, allowing users to customize 3D avatars and socialize in styled rooms. They offer a structured social experience for those who prefer casual chatting over complex gameplay mechanics.
Choosing the Right Social Platform for You
Selecting the best alternative depends on whether you prefer active mini-games, deep creative tools, or simple hangout spaces. Trying out free options allows you to explore different communities and find the environment that best fits your playstyle. Modern desktop social games ensure that everyone can participate in virtual communities without extra hardware costs.

Far Cry New Dawn Twins: Character Guide and...
The post-apocalyptic landscape of Hope County in Far Cry New Dawn introduces a ruthless pair of primary antagonists known as the Twins. Consisting of sisters Mickey and Lou, this duo leads the Highwaymen, a roving faction of marauders who terrorize local survivors to seize vital resources. Understanding their background, personal dynamic, and role in the campaign offers valuable context for players navigating this vibrant yet hostile wasteland.
Origins and Rise of the Highwaymen
Mickey and Lou were raised in a harsh post-collapse world under the influence of their father, Vince, who initially founded the Highwaymen. After growing up in an environment where survival meant dominating others, the sisters eventually took control of the faction and injected their uncompromising philosophy into its members. Their upbringing instilled a belief that the world belongs solely to those willing to take what they want through force.
Distinct Personalities and Combat Dynamics
While Mickey and Lou operate as a unified front, they display distinct personalities and tactics during key narrative moments and combat encounters. Mickey acts as the more strategic and level-headed sister, often assessing situations carefully and using long-range weaponry during battles. In contrast, Lou exhibits a far more impulsive and aggressive demeanor, frequently favoring heavy weaponry like flamethrowers to overwhelm her foes.
Climactic Encounter and Story Resolution
The rivalry between the Security Captain and the Twins culminates during the Problem Solver mission at the New Eden compound. Players face both sisters simultaneously in an intense battle where coordinated strategy and heavy armor-piercing firepower are essential for victory. After Lou is defeated in combat, players are given a pivotal choice regarding Mickey's ultimate fate.
Impact on Hope County's Future
Spares or executes, the fall of the Twins effectively shatters the leadership of the Highwaymen across the region. Sparing Mickey reveals a brief moment of remorse regarding her past actions and prompts her to leave Hope County permanently in search of her mother. Eliminating both sisters ensures the complete collapse of their reign, allowing local communities to rebuild without the constant threat of marauder invasions.

World of Final Fantasy Maxima Review and Gameplay...
World of Final Fantasy Maxima expands upon the charm of the original release by offering a delightful blend of classic role-playing mechanics and creature-collecting gameplay. Designed as a celebratory spin-off, the game invites both veteran franchise fans and newcomers to explore the vibrant world of Grymoire. With added content, enhanced features, and memorable character interactions, it stands out as a unique entry in Square Enix's storied catalog.
The Core Mechanics of Mirage Stacking
At the center of the game's combat system is the creative Mirage stacking mechanic, which allows players to stack monsters and protagonists into cohesive units. By combining creatures of different sizes—Small, Medium, and Large—players alter stats and unlock powerful elemental spells. This strategic layering creates a surprisingly deep tactical layer beneath the cute visual presentation.
Experimenting with different Mirage combinations is essential for conquering tougher dungeon bosses and overcoming environmental obstacles. Each creature possesses its own skill tree, giving players full control over how their team evolves. Maintaining a balanced setup ensures your party can adapt quickly to sudden changes in enemy vulnerabilities.
Exploring the Charm of Grymoire
Traversal in World of Final Fantasy Maxima takes players through lush landscapes, detailed towns, and intricate dungeons filled with hidden treasures. Along the way, players encounter iconic heroes and classic monsters rendered in an charming chibi aesthetic. The lighthearted dialogue and self-aware humor provide a welcome contrast to the more serious main-line entries.
Beyond standard story exploration, players can participate in side activities such as fishing mini-games or testing their team's strength in the Coliseum. These extra challenges reward players with rare items and exclusive battle summons. The diverse assortment of locations keeps the journey feeling fresh and rewarding throughout the entire adventure.
New Features Introduced in the Maxima Edition
The Maxima upgrade introduces several key additions, including the Avatar Change system that lets players transform directly into legendary Final Fantasy heroes during combat. It also increases the maximum number of Mirages players can carry in their active party for greater tactical flexibility. Additional end-game dungeons and a challenging New Game+ mode give dedicated completionists plenty of reason to keep playing.
For fans seeking detailed insights into modern gaming strategies, reviewing the provides excellent context on how modern releases balance depth and accessibility. These system updates enhance an already robust RPG framework without straying from its core accessibility.
Final Verdict on the Gameplay Experience
World of Final Fantasy Maxima successfully balances nostalgic fan service with engaging turn-based combat. While the tone may lean heavily into whimsical tropes, the underlying depth of the Mirage system ensures a satisfying experience for strategy enthusiasts. It remains a standout title that offers hours of rewarding gameplay for fans of monster-taming RPGs.

Steam Deck Bring Up Keyboard And The Easiest...
Navigating the Steam Deck handheld console is generally intuitive, but entering text into search bars, chat windows, or non-Steam applications can sometimes pose a challenge for users. While the system automatically detects text boxes in most verified native games, invoking the virtual interface manually remains an essential skill for everyday navigation. Knowing how to summon this tool instantly saves time and prevents interruptions during intense gaming or desktop sessions.
Mastering the Universal Hardware Shortcut
The primary method to summon the touch keyboard across any game or menu is pressing the dedicated Steam button simultaneously with the X button. Holding the Steam button for two seconds displays a helpful overlay listing all active system shortcuts, reinforcing this default command. Utilizing this physical button combination bypasses automatic software detection and forces the interface onto the screen immediately.
This physical shortcut proves indispensable when navigating non-Steam titles or modified launcher software that fails to trigger native pop-ups. Players can swiftly enter password fields or character names without leaving their active window. Learning this default input combination ensures smooth navigation across the entire SteamOS environment.
Accessing Text Input in Desktop Mode
Switching over to the Linux desktop mode transforms the portable device into a full personal computing workstation. However, clicking into web browsers or configuration files will not automatically invoke the digital key layout. Users must rely on the Steam plus X command while the Steam client application runs silently in the background.
If the background client is closed, the hardware shortcut will cease functioning until the main application reopens. Users can alternatively tap the quick access menu or configure desktop controller configurations to assign keyboard toggles directly to rear grip buttons. Establishing custom shortcuts minimizes reliance on attached external peripherals while working on desktop tasks.
Customizing Keyboards and Alternative Input Options
Valve offers extensive visual and functional customization options for the virtual input overlay directly within system settings. Users can download distinct themes from the Points Shop or adjust trackpad typing sensitivity to match personal preferences. Dual trackpad typing allows users to glide both thumbs over responsive touch zones for faster text entry.
For extensive typing sessions or administrative tasks, pairing a wireless Bluetooth keyboard or connecting a physical USB peripheral provides maximum comfort. Touchscreen taps also offer a direct, responsive alternative when quick entries like passwords or short search queries are required. Combining these hardware options ensures optimal flexibility for every handheld scenario.

Where To Find Hearty Truffle TOTK Locations And...
Exploring the vast landscapes of Hyrule in Tears of the Kingdom presents adventurers with numerous environmental obstacles and fierce enemies. To survive these high-stakes encounters, gathering rare cooking ingredients that offer full recovery and extra temporary hearts is absolutely essential. The Hearty Truffle remains one of the most sought-after resources for players looking to maximize their resilience during extended journeys.
Top Surface Locations for Hearty Truffles
Unlike standard mushrooms that grow abundantly in open forests, Hearty Truffles are typically tucked away in hidden, moisture-rich environments across Hyrule. Players can frequently locate them inside damp caves, stone wells, and shadowy caverns scattered throughout the Central Hyrule and Necluda regions. Checking beneath large fallen trees or near subterranean rock formations often yields great rewards for observant trackers.
One reliable hotspot is the deep cave system surrounding the wetland areas east of Lookout Landing, where the fungi thrive in the darkness. Exploring these cavernous zones thoroughly with a scanning resource can quickly increase your active inventory. Be sure to clear out any regional monsters guarding the entrance before safely collecting your prize from the cavern floor.
Unlocking Hidden Caverns and Well Secrets
Many of the best foraging spots require players to use their legal abilities or heavy weaponry to blast through cracked stone barriers. Local wells located near ruined villages frequently lead to extensive underground networks filled with unique flora. Dropping into these secluded chambers allows you to harvest rare variations of truffles that cannot grow on the sunny surface.
The specific geography around the base of the Dueling Peaks also features several narrow crevices worth exploring with your paraglider. Navigating these steep cliffs reveals damp alcoves where the truffles grow silently away from regular travel paths. Keeping a steady supply of brightbloom seeds ensures you never miss a hidden corner while searching these dark zones.
The Best Cooking Recipes for Full Recovery
Cooking is a central and highly rewarding mechanic that transforms raw ingredients into powerful restorative meals for Link. Tossing a single Hearty Truffle into a lit cooking pot creates a basic skewer that instantly refills your entire health bar while adding bonus temporary hearts. Combining multiple rare ingredients together can significantly boost the number of extra hearts provided by the finished dish.
To create a highly efficient meal, mix the truffle with raw meat or fresh herbs to ensure a balanced combination. These specialized dishes are incredibly valuable when preparing for major boss fights or exploring climate-locked zones like the molten depths. Storing a few of these robust recipes in your inventory ensures you can recover instantly from catastrophic damage at any moment.
Fallout 3 Locate The Family Quest Walkthrough And...
Exploring the dystopian Capital Wasteland in Fallout 3 brings players face to face with numerous moral dilemmas and complex storylines. One of the most memorable early investigations you can undertake is Blood Ties, which tasks the Lone Wanderer with finding a missing youth named Ian West. This intricate journey leads to an enigmatic group known as The Family, hiding deep underground away from the surface horrors.
Investigating the Evils of Arefu
The quest begins in the small, vulnerable settlement of Arefu, which is built on a crumbling highway overpass. The town leader, Evan King, asks for your assistance in checking on the local residents after recent violent disruptions. Upon investigating the West family home, you discover a tragic scene that suggests a sinister nocturnal attack occurred.
Evan King urges you to track down Ian West, who has mysteriously vanished following the strange demise of his parents. To find his location, you must search nearby landmarks including the Northwest Seneca Station and various underground tunnels. This initial phase requires careful investigation of terminal logs and environmental clues left behind by the attackers.
Navigating the Merging Underground Metro
Your search eventually points toward the dark, radiation-filled corridors of the local subway network. Inside the tunnels of Northwest Seneca Station, you will encounter two ghoul scientists conducting peculiar biochemical experiments. Navigating deeper past dangerous traps and feral ghouls will eventually grant you entry to the hidden hideout of the mysterious faction.
The secret entrance is heavily guarded by a sentry named Robert, who demands an explanation or a steep bribe before letting you pass. Utilizing high Speech skills or presenting a letter from a relative can help you bypass this confrontation peacefully. Once inside, you find a structured society that lives under a strict philosophical code regarding blood consumption.
Confronting the Charismatic Vance
At the heart of the lair stands Vance, the eloquent and protective leader who guides his followers through a highly controlled lifestyle. He explains that his group consists of individuals managing severe cannibalistic urges by reframing themselves as vampires. To speak with Ian West, you must first understand Vance's perspective and show respect for their underground sanctuary.
Vance will agree to give you the password to Ian's private room if you take the time to learn their core laws. Alternatively, players can pickpocket the key or hack the terminal if they prefer a stealthier approach. Gaining peaceful access allows you to have a critical conversation with the traumatized youth about his future decisions.
Deciding the Fate of Ian West
When you finally locate the boy, you find him locked away while struggling with immense guilt over his family's fate. The primary objective shifts to helping him choose whether to return to a normal life or remain with his new mentors. Your dialog choices here determine whether he returns to Arefu or embraces his vampire identity permanently.
You can use a letter from his sister Lucy to remind him of his former life and convince him to return home safely. If you encourage him to stay with the underground community, he will commit fully to their unique lifestyle. Both choices offer distinct narrative resolutions that impact how the wasteland views the faction.
Negotiating a Lasting Peace Agreement
The ultimate resolution of the quest depends on your ability to establish a diplomatic bridge between Arefu and Vance's followers. You can propose a mutual agreement where the citizens of Arefu supply blood packs to the group in exchange for physical protection. This diplomatic outcome requires a successful Speech check or advanced knowledge of medical benefits.
Securing this peaceful alliance yields excellent mechanical rewards, including the highly valuable Shishkebab weapon schematic from Vance. Additionally, you will gain the ability to consume blood packs for significantly increased health restoration throughout your journeys. Choosing a violent path and eliminating the group remains an option, but it deprives the wasteland of a fascinating alliance.
What to Do With Legendary Bear Pelt in...
Conquering the massive Bharati Grizzly Bear early in Red Dead Redemption 2 provides players with one of the first major hunting achievements in the game. After surviving the intense encounter alongside Hosea Matthews, you are left with a massive, high-value animal hide loaded onto your horse. Deciding what to do with legendary bear pelt in rdr2 best uses explained options ensures you maximize its crafting utility rather than letting this unique prize go to waste.
Selling the Hide to the Right Merchant
The absolute best place to take your massive trophy is straight to a Trapper, a specialized merchant who deals exclusively in rare wildlife materials. Unlike standard town butchers who offer minimal payouts for standard animal parts, this specialized wilderness merchant recognizes the true value of unique creatures. Handing over the hide rewards you with an immediate financial boost of sixty dollars to help fund your early camp upgrades.
Selling the hide does not mean you lose access to it for crafting purposes down the line. The merchant permanently holds onto the material in their inventory, allowing you to unlock unique gear pieces whenever you have the funds. Tracking down the closest traveling market stall, usually found in the wilderness northeast of Emerald Ranch, is the most efficient way to secure your profit.
Crafting Unique Headwear and Outfit Components
Once the merchant secures the pelt, you gain access to the exclusive Bear Grenadier outfit set which completely transforms Arthur Morgan's appearance. The most iconic piece of this collection is the Legendary Bear Head Hat, a striking headpiece created directly from the creature's face. This item requires the unique pelt plus an additional small fee to permanently add to your wardrobe collection.
You can also combine this massive hide with other perfect animals to craft custom rugged clothing options. The merchant can combine parts of your trophy with a perfect bison hide to create heavy wilderness coats that protect you from brutal snowy weather. Wearing these custom garments adds distinct visual flair while keeping your core attributes fully protected during high-altitude expeditions.
Unlocking Useful Camp Decorations
Beyond personal wardrobe options, your legendary hunt can be used to dramatically improve the overall aesthetic comfort of your home base. Bringing the material directly back to Pearson at the camp allows you to unlock specialized cosmetic upgrades for the main seating areas. This transforms the standard wooden benches into a luxurious covered resting space for the entire gang to enjoy.
Decorating the living spaces helps build camp morale and changes how your companions interact with the environment around them. These custom camp upgrades require zero financial investment once the necessary hunting components are successfully delivered to the cook. Utilizing your hard-earned trophies for base customization ensures your hunting achievements leave a lasting impact on the entire storyline.
What Happens if You Lose the Pelt
Many novice hunters experience panic if they accidentally fall in battle or lose their horse cargo while traveling across rugged terrain. Fortunately, the game features a protective mechanic that prevents players from permanently losing access to essential crafting components. If you drop the hide in the wilderness, the items automatically transfer directly to the nearest merchant's crafting inventory.
While you lose out on the immediate sixty-dollar cash payout, you never lose the ability to craft the exclusive clothing items. You can simply ride to the nearest wilderness market stall and find the components waiting for your next customization project. This smart design choice ensures that unexpected accidents or sudden ambient ambushes never ruin your overall progression through the tracking challenges.

yukari persona 3 social link Yukari Social Link...
Navigating the social landscape in Persona 3 requires balancing academic responsibilities, dungeon exploration, and meaningful interpersonal relationships. Among the most compelling narratives is the bond formed with your classmate, Yukari Takeba, who represents the Lovers Arcana. Building this relationship provides deep narrative context regarding her troubled past and unlocks powerful tactical advantages for your battles in Tartarus.
Unlocking the Lovers Arcana Bond
Initiating this relationship requires patience because it cannot be accessed during the early weeks of the school year. Players must first advance through the main story campaign until late July when the summer semester begins. Furthermore, the protagonist must maximize his personal statistics by reaching the absolute highest level of Charm before Yukari will consider spending time alone outside of school operations.
Once the initial entry requirements are satisfied, you can typically locate her standing near the classroom hallway on designated weekdays. Engaging in these optional afternoon meetings shifts the focus away from global supernatural threats and toward localized high school drama. Investing time in her storyline is highly recommended for anyone looking to optimize their battle party performance.
Optimal Dialogue Options and Point Maximization
To progress through the ranks efficiently, you must choose dialogue options that resonate with her specific emotional struggles and personality traits. Yukari appreciates honesty, independent thinking, and genuine emotional support as she copes with family burdens. Choosing defensive or dismissive answers will reduce the hidden relationship points earned, forcing you to waste valuable free days on non-ranking interactions.
Carrying a matching persona of the Lovers Arcana in your active inventory is another critical strategy for rapid progression. This simple preparation provides a continuous passive bonus to all relationship points gathered during your conversational events. Maximizing each hangout session ensures you can complete her storyline before winter exams arrive.
Managing Romance Boundaries and Rank Milestones
As you approach the higher levels of this social path, the narrative introduces critical choices that determine the ultimate nature of your relationship. Players can choose to maintain a supportive platonic friendship or steer the conversations toward a serious romantic commitment. Carefully reading her emotional cues during ranks seven and eight will allow you to navigate these pivotal turning points successfully.
Reaching the final rank milestones rewards your dedication by unlocking the ability to fuse the ultimate persona of the Lovers Arcana. This powerful entity grants your team devastating magical capabilities and unmatched elemental healing support during endgame challenges. Ultimately, completing her journey provides a fulfilling resolution to one of the game's most memorable character arcs.

Game Room Bean Bag Chairs for a Comfortable...
Creating the perfect environment for gaming involves balancing cutting-edge technology with high-quality physical comfort. While many enthusiasts focus entirely on high-resolution monitors and ergonomic desks, the choice of seating plays a massive role in preventing fatigue. Incorporating versatile furniture options like bean bag chairs can completely transform an ordinary room into a relaxing haven for long entertainment sessions.
The Ergonomic Benefits of Modern Bean Bags
Traditional furniture often forces the body into rigid positions that can cause discomfort over time. Modern bean bag chairs resolve this issue by naturally contouring to your body shape and providing adaptive support for your spine. This flexibility helps distribute weight evenly, reducing the pressure placed on your lower back and neck during intense gameplay.
Many modern designs incorporate premium memory foam filling instead of standard polystyrene beads. This material retains its shape much longer and offers a firmer structure that supports a healthy posture. Investing in a supportive seat ensures you can remain focused on your favorite games without dealing with physical distraction or muscle strain.
Maximizing Space and Layout Flexibility
Unlike massive traditional recliners, bean bag chairs are remarkably lightweight and easy to move around the room. This mobility makes them ideal for multi-purpose spaces or smaller apartments where layout requirements change frequently. You can easily shift your seating closer to a large screen for cooperative local multiplayer or move it aside when the floor space is needed.
Many configurations benefit greatly from having low-profile seating that complements a primary desk arrangement. Adding a casual seating area allows friends to join the session comfortably without overcrowding the room. This makes your entertainment zone far more inviting and functional for social gatherings and casual streaming nights.
Selecting the Right Materials for Longevity
When choosing a bean bag chair for daily use, the exterior fabric requires careful consideration. Gamers often spend hours in the same spot, meaning breathable materials like high-quality cotton or specialized mesh are excellent choices to stay cool. For households with pets or frequent snacks, durable and water-resistant synthetic fabrics offer the best protection against unexpected spills.
Many premium models also include removable, machine-washable outer covers that make regular maintenance incredibly simple. Selecting a sturdy fabric with reinforced stitching guarantees the furniture can withstand years of active use. Taking the time to evaluate these material details prevents premature wear and keeps your setup looking pristine.
Enhancing the Visual Appeal of Your Setup
Beyond comfort, your choice of furniture contributes significantly to the overall aesthetic theme of your room. Bean bag chairs come in a vast array of shapes, sizes, and colors that can easily match your existing decor. Whether you prefer a minimalist neutral tone or a vibrant color that matches your custom RGB lighting, there is a design available to suit your style.
A well-chosen seat acts as a stylish focal point that ties your decorations, posters, and equipment together. Creating a visually cohesive space makes your environment feel like a true personal escape from daily stress. By focusing on both style and functionality, you can build a balanced sanctuary tailored precisely to your relaxation needs.

Persona 3 Reload Female Protagonist Explained
The release of Persona 3 Reload brought the beloved 2006 RPG masterpiece into the modern era with breathtaking visuals and updated gameplay mechanics. However, long-time fans quickly noticed the absence of the prominent female main character who originally debuted in Persona 3 Portable. Understanding why this choice was made requires a closer look at development hurdles and the historical context of the franchise.
The History of the Female Protagonist
Atlus originally introduced the female protagonist, often affectionately called FeMC or Kotone Shiomi by the community, in the 2009 PlayStation Portable release. Her inclusion was designed to offer a fresh perspective for returning players, completely altering the game's aesthetic and musical identity. She featured an entirely unique bright pink user interface alongside a more upbeat, energetic soundtrack that contrasted with the original male protagonist's blue-toned themes.
Beyond aesthetic choices, her presence fundamentally altered how players interacted with the supporting cast of characters. She introduced entirely exclusive Social Links, allowing players to build deeper relationships with male party members who previously lacked dedicated character arcs. This addition added immense replay value and cemented her status as a beloved icon among JRPG enthusiasts worldwide.
Why She Is Missing in Persona 3 Reload
The development team at Atlus explicitly confirmed that Persona 3 Reload was built from the ground up to faithfully recreate the original experience. Recreating the female route would have required a massive development cycle, effectively demanding double the amount of voiced dialogue and cutscenes. Because the remake focuses heavily on maximum fidelity and cinematic storytelling, the resources needed to adapt her route were deemed too high.
Producer Kazuhisa Wada explained that while the studio acknowledged the immense fan passion, the structural differences between the two protagonists made a simple inclusion impossible. Incorporating her storyline would mean redesigning numerous animated sequences and rewriting significant portions of the main script to accommodate her distinct personality. Consequently, the team prioritized perfect optimization and expansion of the canonical male protagonist's journey.
The Gameplay and Narrative Impact
The exclusion of the female main character means that certain exclusive narrative paths and romance options remain locked to legacy hardware. For instance, her route allowed players to save specific characters from tragic fates, an option that is completely absent in the standard storyline. Her dialogue choices also reflected a bubbly, outgoing persona that differed heavily from the stoic nature of the male lead.
While players miss out on these specific social dynamics, Persona 3 Reload compensates by introducing brand-new Link Episodes for male teammates. These scenarios provide the deeper character development that fans originally loved in the Portable version without needing to alter the core protagonist. This compromise ensures that modern players still receive a comprehensive look at the entire supporting cast.
How Fans Can Still Experience Her Story
For gamers eager to experience the distinct perspective of the female lead, Persona 3 Portable remains widely available on modern platforms. Atlus recently remastered the portable edition for current consoles and PC, ensuring her unique narrative route is preserved for future generations. Playing this version allows fans to appreciate the distinct writing style and unique musical scores that make her journey stand out.
The preservation of legacy titles ensures that both versions can coexist as unique artistic interpretations of the same tragic story. While Persona 3 Reload stands as the definitive visual experience, the portable counterpart retains its value through its inclusive and diverse gameplay options. Choosing which version to play depends heavily on whether a gamer prefers cutting-edge graphics or deep narrative variations.

Winner Winner Chicken Dinner GIF Ideas And Popular...
The exhilarating rush of securing a hard-fought victory is a universal experience shared by millions of gamers across the globe. Among the many phrases used to celebrate these digital triumphs, none has captured the collective imagination quite like the iconic phrase celebrating a successful battle royale finish. As gaming communities continue to expand, finding creative ways to share these victorious moments through animated loops has become a central part of modern internet expression.
The Historical Roots of a Gaming Phenomenon
While many contemporary players associate the classic phrase with modern battle royale titles like PUBG, its actual origins date back much further into the twentieth century. The expression initially gained popularity within the vibrant gambling circles of old alleys and casinos as a celebratory cheer for winning a standard bet. Over the decades, this catchy slogan slowly transitioned from traditional street culture into the digital landscapes of competitive video games.
When developers integrated the announcement into their final victory screens, it transformed an old phrase into an overnight global sensation. Today, the words serve as the ultimate badge of honor for survivors who manage to outlast dozens of competing players in a single match. Understanding this rich history adds a layer of appreciation whenever you see the text flashing across your screen after an intense shootout.
Creative GIF Ideas to Celebrate Your Victory
Sharing your triumph with friends requires the perfect visual asset that accurately captures the intense emotion of the moment. One highly popular concept involves combining the classic victory text with stylized retro neon animations that flash brightly on loop. Another excellent approach is utilizing dramatic slow-motion clips of in-game avatars performing custom victory dances amidst falling golden confetti.
For players who prefer humor, creating loops that feature actual frying pans reflecting laser beams or comedic pixel art chickens wearing crowns provides a lighthearted alternative. You can also juxtapose the triumphant text over chaotic gameplay footage to show the contrast between a messy battle and a perfect ending. These diverse visual strategies ensure that your celebratory messages stand out vividly on various social media timelines.
How Battle Royale Shaped Modern Gaming Culture
The sudden rise of competitive survival games completely altered how developers design multiplayer experiences and how audiences consume media. Players no longer just focus on individual scores, but rather on the collective narrative of surviving against overwhelming environmental odds. This shift has fostered massive online communities where fans routinely share their highlights, tactical failures, and hilarious glitches.
These shared experiences have turned specialized terminology and inside jokes into a recognized form of mainstream digital folklore. As streaming platforms grow, the visual language surrounding these games continues to influence global entertainment trends significantly. The desire to achieve the ultimate victory status keeps millions of dedicated participants logging in every single day.
Capturing Unforgettable Moments in Esports History
Professional tournaments have elevated standard competitive matches into legendary spectacles watched by massive worldwide audiences. Some of the most memorable moments in esports involve underdog teams executing flawless strategic maneuvers during the final seconds of a tournament. These clutch plays are instantly immortalized by fans who convert the live footage into high-quality digital animations.
Having access to these iconic clips allows the community to relive the exact tension and excitement of the live broadcast forever. Whether it is a miraculous long-range grenade throw or a dramatic vehicle escape, these highlights define the peak of human gaming skill. Re-watching these legendary milestones continues to inspire the next generation of competitive players to hone their skills.

Will a PS5 Controller Work on PC Compatibility...
The Sony PlayStation 5 DualSense controller is widely celebrated for its revolutionary ergonomics, advanced haptic feedback, and immersive adaptive triggers. Many desktop gamers wonder if they can bring this premium console experience over to their rigs without encountering major software roadblocks. Fortunately, Windows computers offer robust support for this hardware, allowing players to bridge the gap between console design and PC gaming flexibility.
Hardware Compatibility and Windows Recognition
Modern Windows operating systems natively recognize the PlayStation 5 controller as a standard input device right out of the box. When you plug the peripheral into a desktop or laptop, the system automatically configures the basic drivers needed for immediate use. However, while the physical buttons and analog sticks will map cleanly, some specialized ecosystem features require tailored game support to function properly.
Major gaming platforms like Steam have integrated comprehensive mapping configurations that translate console inputs seamlessly into PC environments. This widespread integration ensures that your favorite titles will register your movements with minimal configuration required on your part. Players can jump into their digital libraries with confidence knowing that hardware barriers have largely been dismantled by recent software updates.
Wired Connection via USB-C
For the most stable and latency-free gaming experience, a wired connection using a standard USB-C to USB-A or USB-C to USB-C cable is highly recommended. Simply attach one end to the DualSense controller and the other directly to an open port on your computer case. The operating system will instantly flash a notification confirming that a new audio and input peripheral has been successfully paired.
Utilizing a physical cable is also the primary method required to unlock the controller's most advanced immersion features, such as dynamic haptic feedback and resistive triggers. Many modern PC ports natively support these traits over a wired line, assuming the game developers built the code to utilize them. Furthermore, keeping the device plugged in ensures that your battery remains fully charged during extended multiplayer sessions.
Wireless Connection via Bluetooth
If you prefer a clean setup free from tangles, connecting the peripheral wirelessly via Bluetooth technology is an incredibly simple process. To initiate this, hold down the central PlayStation button and the Share button simultaneously until the light bar begins to pulse rapidly. This signal indicates that the device has successfully entered its pairing mode and is actively broadcasting to nearby receivers.
Next, open your computer's system settings menu, navigate to the bluetooth section, and select the option to add a new device. The hardware will appear in the available listings as a Wireless Controller, allowing you to establish a secure link with a single click. Keep in mind that wireless connections occasionally limit access to proprietary haptics depending on how specific game launchers handle Bluetooth audio signals.
Maximizing Game Support and Advanced Features
To ensure absolute compatibility across your entire game library, configuring your launcher settings is a crucial final step. Steam offers an excellent native interface under its controller settings tab that allows users to enable PlayStation configuration support globally. This software layer translates standard inputs smoothly, even for older titles that were initially coded to recognize only Xbox configurations.
For games purchased outside of major storefronts, third-party emulation tools can bridge any remaining compatibility gaps by creating virtual inputs. These utility programs allow you to customize your trackpad behavior, adjust dead zones, and even modify the LED light strip colors to match your PC aesthetic. With a small amount of adjustment, your console gamepad transforms into the ultimate PC companion device.

Doom Eternal Super Gore Nest Secrets and Hidden...
Navigating the fleshy, industrialized labyrinth of Doom Eternal's fifth mission presents one of the most intense gameplay spikes in the entire campaign. The Super Gore Nest is not only packed with relentless demonic hordes, but it also hides numerous optional items that require keen environmental awareness to discover. This guide provides tactical insights to help you uncover every hidden item while surviving the chaotic topography of this corrupted industrial zone.
Tracking Down Elusive Toys and Cheat Codes
Finding the miniature figures scattered across the level requires keeping a close watch on hidden breakable walls and sudden drop-offs. One easily missed toy is tucked away inside a fleshy pillar that players can access only after activating the local teleporter systems. Striking the cracked surface with a standard melee attack reveals the hidden collectible hidden securely within the biological infrastructure.
The hidden cheat code requires a deliberate leap of faith near the rotating column surrounded by toxic sludge pools. Looking closely at the lower support beams reveals an intentional opening that lets the Slayer fall directly onto a hidden ledge. Grabbing this disc expands your customization options for subsequent mission replays from the Doom Fortress hub.
Locating Sentinel Batteries and Praetor Suit Tokens
Upgrading your defensive capabilities relies heavily on tracking down the spectral spectral knights holding valuable progression tokens. One such token rests behind a locked gate that requires navigating a sequence of booster pads and wall climbs over the central arena. Timing your dash mechanics carefully ensures you slide directly into the alcove before the environmental hazards reset.
Sentinel Batteries are equally vital for unlocking structural upgrades back on your command ship. You can secure one by examining the massive sewer pipes situated beneath the main bridge structure where the flesh meets the steel machinery. Striking a loose grate allows the Slayer to drop directly onto the power source without wasting extra ammunition.
Conquering Secret Encounters and Album Releases
The pink gore nests hidden away in dark corners trigger optional timed combat trials that test your rapid weapon switching. Clearing these intense skirmishes quickly requires deploying high-damage weapon configurations like the Super Shotgun and Ballista combo to dissolve heavy demons before the timer expires. Success grants weapon points necessary to maximize your overall combat efficiency.
For music enthusiasts, finding the classic sound discs involves exploring the branching maintenance corridors situated near the yellow gore key altar. A subtle jump pad hidden behind a column launches players up toward a ventilation shaft containing the prized collectible. Collecting these items allows you to enjoy iconic retro soundtracks between your intense battles.
Navigating the Final Escape and Slayer Gate Key
Reaching the heavily guarded Slayer Gate requires finding the corresponding purple key hidden in the highly radioactive industrial substructure. Players must navigate a sequence of swinging bars while managing their rad-suit shielding metrics to reach the high platform. Entering this optional arena challenges players with an unforgiving combat encounter that yields an Empyrean Key upon completion.
The final countdown sequence forces you to navigate back through the changing landscape under a strict time limit. Keeping a steady eye on your map configuration ensures you do not get turned around by newly spawned environmental blockades. Reaching the extraction portal concludes your comprehensive exploration of this grotesque demonic stronghold.

Icy Peak Hello Kitty Island Adventure Guide
Navigating the frozen trails of the Icy Peak in Hello Kitty Island Adventure presents an exciting challenge for players looking to fully expand their island paradise. This chilly sub-region is filled with unique environmental mechanics, hidden collectibles, and vital story checkpoints that require a tactical approach to exploration. Understanding how to manage the steep vertical terrain and chilly climate ensures your cozy expedition goes as smoothly as possible.
Unlocking the Mountain Paths
Before you can begin your snowy ascent, you must complete specific prerequisite quests related to the island mysteries. Progression typically requires finishing the Stargazing storyline and safely executing a challenging rescue operation alongside your favorite Sanrio companions. Once these baseline narrative elements are cleared, the frosty mountain passages become fully accessible for exploration.
Preparing your character for the high-altitude climate involves choosing the right companion skills and tools. Utilizing specialized thermal potions can temporarily mitigate regional hazards, giving you more time to survey the cliffs safely. Keeping a steady eye on changing weather conditions helps prevent sudden structural setbacks as you climb higher.
Mastering the Chilly Slopes
Ascending the slippery vertical rock faces requires a mix of patience and strategic character management. Many experienced players recommend waiting for strong winds to subside entirely before attempting difficult leaps. Utilizing Pekkle's signature speed-climbing ability can give you a major tactical advantage on the steepest sections.
Finding a safe rhythm during early morning exploration or late-winter conditions often yields the most predictable climbing physics. Taking structured breaks on durable surfaces ensures your stamina meters remain optimally charged for the next big jump. Coordinating your traversal paths with family or friends can turn a daunting solo journey into a fun team activity.
Discovering Hidden Collectibles
The snow-covered peaks hide several valuable resources and missing mailboxes that are essential for completing regional checklist achievements. Thoroughly exploring every plateau reveals hidden crafting blueprints and exclusive winter furniture sets tucked away in frosty corners. Tracking these items down helps raise your overall relationship scores with the island's unique inhabitants.
Many elusive items require creative platforming combinations or specific timing to reach safely. Returning to previously explored ledges after unlocking new climbing equipment often reveals paths that were completely invisible before. Keeping a detailed personal map of your discoveries ensures you never miss a vital regional checkpoint.

How to Reach Dead Crone Rock
Navigating the rugged landscapes of Skyrim often leads adventurers to dangerous ruins hidden high up in the mountains. Dead Crone Rock is one such ancient fort located in the westernmost area of the Reach, serving as a critical location for multiple important quests. Reaching this isolated tower requires careful preparation, a clear strategy for climbing the vertical terrain, and the combat skills to survive aggressive defensive factions.
Starting the Journey from Markarth
The most reliable way to begin your expedition is by establishing a base of operations at the major nearby city of Markarth. From the city gates, you should travel directly southwest into the dangerous mountain passes that define the region's geography. Following the primary dirt roads will keep you on the right path, though you must remain alert for sudden wildlife attacks and Forsworn ambushes along the riverbanks.
As you descend deeper into the valley, look for a prominent stone bridge crossing the rapid waters. Crossing this structure ensures you stay on course toward the base of the mountains where the ancient ruins are built. The winding paths can be incredibly confusing, so keeping your local map active will help prevent accidental detours into dead ends.
Navigating Through Hag Rock Redoubt
Before you can step foot inside Dead Crone Rock, you must first fight your way through the extensive external fortress known as Hag Rock Redoubt. This multi-leveled ruin acts as a heavily fortified checkpoint guarded by skilled Forsworn warriors and destructive mages. Adventurers need to locate the main stone steps and systematically clear out each tier of the defensive outpost to unlock upper pathways.
Progressing through the encampment requires climbing several wooden scaffolding structures and navigating narrow stone bridges. You will need to locate an iron door leading into the interior barracks, which eventually routes back out to the highest exterior balconies. Clearing this zone patiently guarantees you will not be overwhelmed by reinforcements from behind during your final ascent.
Climbing the Peak to Dead Crone Rock
Once you exit the upper levels of the redoubt, the towering structure of Dead Crone Rock will be clearly visible against the mountain skyline. A final set of steep stone stairs connects the camp to the main entrance of the isolated watchtower. You should ensure your attributes are fully replenished before approaching the threshold, as powerful magical traps often guard the entryway.
The interior of the tower features vertical spiral staircases that lead directly to the open-air summit. It is on this high peak where you will encounter the unique boss holding the coveted pommel stone of Mehrunes Razor. Securing victory on this narrow rooftop provides not only legendary artifacts but also a spectacular view across the western borders of the province.

Kitana Moves and Combos in Mortal Kombat 11
Kitana remains one of the most iconic warriors in Mortal Kombat 11, blending lethal elegance with versatile mid-range control. Mastering her move set requires players to understand how her spatial awareness and signature fan attacks dictate the flow of combat. By combining calculated spacing with precise juggle combos, players can punish opponents effectively while maintaining complete control of the stage.
Essential Special Moves and Zoning Control
Kitana's core strategy relies heavily on her signature Fan Toss, which serves as a reliable zoning tool across mid to long distances. Players can utilize air variations of this attack to catch jumping opponents off guard and control vertical space. Her Square Wave move offers quick mobility, allowing her to punish whiffed attacks or quickly close the distance when an opening appears.
Understanding the frame data behind her special attacks helps in maintaining stage pressure without exposing Kitana to unsafe counterattacks. Incorporating Ground Boot and Royal Protection into custom loadouts provides additional defensive utility against aggressive playstyles. Learning the optimal ranges for these moves ensures you can keep opponents guessing throughout the match.
Executing Essential Combo Strings
Kitana excels at mid-screen combo execution, relying on launcher moves to initiate devastating aerial juggles. A foundational sequence begins with her Back 2, 3, 1 string, which pops the opponent up for follow-up attacks. Connecting this launcher into an amplified Fan Lift extends the combo time, giving players ample opportunity to land heavy enders.
For optimal damage, players should practice transitioning from ground normal attacks directly into special moves before the opponent recovers. Extending juggles with jump-in attacks like Jump 3 or Jump 4 helps maximize damage output while pushing the enemy toward the corner. Consistent execution of these sequences transforms small punishes into significant health bars lost.
Corner Pressure and Mix-Up Strategies
Cornering an opponent with Kitana opens up high-damage potential and relentless pressure opportunities. Her basic combo strings become significantly more threatening near the arena boundary, where gravity scaling is easier to manage. Utilizing her low and overhead mix-ups keeps defending opponents trapped in difficult guessing situations.
Maintaining momentum in the corner requires balancing aggressive pressure with patient spacing to prevent defensive wake-up attacks. Using safe block strings allows Kitana players to sustain pressure without giving up their advantage. Mastering these corner setups ensures that trapped opponents have very few options to escape safely.
Mastering Neutral Game and Whiff Punishing
Success with Kitana depends heavily on mastering the neutral game and capitalizing on the opponent's missteps. Her fast walk speed and extended attack reach make her exceptionally skilled at baiting out unsafe moves from rival fighters. Observing opponent habits at mid-range allows you to execute immediate whiff punishes using her sweeping fan attacks.
Patience remains key when playing Kitana, as overextending can leave her vulnerable to high-damage counters. Utilizing long-reaching normal strikes like Forward 2 helps check advancing enemies without risking severe frame penalties. Combining strong spacing fundamentals with sharp reactions ensures consistent performance in competitive ranked matches.

Star Wars The Force Unleashed Complete Walkthrough
Navigating the gripping narrative of Star Wars Legends becomes an epic journey when mastering the destructive powers of Darth Vader's secret apprentice, Starkiller. This definitive walkthrough provides crucial strategic guidance to help you conquer every chapter, manage complex boss fights, and unlock hidden collectibles across the galaxy. By understanding the core mechanics of Force optimization and lightsaber combat, players can seamlessly experience one of the most impactful stories in the extended franchise universe.
Mastering the Prologue on Kashyyyk
Your journey begins in the heavy armor of Darth Vader as he hunts down a rogue Jedi survivor on the Wookiee homeworld. This opening sequence serves as a sandbox to test maximum Force capabilities against waves of hostile soldiers. Utilizing standard lightsaber strikes in combination with devastating telekinetic pushes allows you to clear paths efficiently while sustaining minimal damage.
As you progress through the burning forests, pay close attention to structural targets that can be manipulated to crush advancing enemies. The primary goal is to reach the central wooden structure where the final encounter initiates a cinematic transition into the main storyline. Defeating the rogue Jedi requires consistent pressure and timely reactions during the initial quick-time events.
Navigating the TIE Fighter Factory
Stepping into the role of a grown Starkiller shifts the gameplay focus toward high-mobility aerial maneuvers and versatile energy management. The industrial complex is filled with aggressive Imperial guards, heavy combat droids, and complex vertical layouts that require precise navigation. Combining your lightning abilities with mid-air dashes helps you control large groups of enemies before they can overwhelm your positioning.
The culmination of this industrial zone forces you to confront General Rahm Kota on a rapidly overheating platform. To survive this encounter, players must prioritize deflecting incoming projectiles while waiting for brief windows of vulnerability. Once the boss shifts his stance, execute swift lightsaber sequences followed by immediate defensive repositions to secure a definitive victory.
Surviving the Perils of Raxus Prime
The massive junk world presents unique environmental hazards alongside aggressive local scrap scavengers that can rapidly deplete your health pool. Navigating this desolate wasteland demands constant awareness of unstable platforms and localized toxic exhaust vents. Upgrading your health regeneration parameters early in this level provides a vital buffer during prolonged combat encounters.
The final segment requires players to manipulate the environment using maximum telekinetic power to pull a massive spaceship down from orbit. Successfully managing this legendary sequence depends on maintaining a consistent rhythm between clearing incoming fighter ships and aligning your manual alignment controls. Keep your focus steady and dodge incoming lasers until the mechanical prompts signal total mission success.
Confronting the Dark Side Decisions
The final chapters lead Eivor to critical narrative choices that completely reshape the galactic political landscape. Venturing deep into the heart of the Death Star structure brings you face-to-face with the ultimate masters of the dark side. Striking a perfect balance between offensive spell usage and tight defensive parries is essential to surviving these prolonged endgame engagements.
Each phase of the ultimate boss battle tests your comprehensive understanding of every mechanic acquired throughout the entire journey. Focus on exploiting brief openings rather than executing long, risky attack sequences that leave you exposed to counterattacks. Overcoming this trial officially completes the main campaign and unlocks advanced cosmetic customization options for future playthroughs.

One Piece World Seeker Map And Important Locations
Exploring the expansive environments of Jail Island in One Piece World Seeker offers anime fans a unique chance to step directly into the boots of Monkey D. Luffy. The game transitions traditional anime storytelling into a large, interconnected open-world environment filled with diverse biomes and hidden treasures. Navigating this vast geography efficiently requires a solid understanding of the primary landmarks and how their unique layouts impact your exploration strategy.
The Bustling Urban Hubs of Jail Island
Steel City stands as the primary urban center on the map, characterized by its towering modern architecture and vertical traversal challenges. Luffy can utilize his rubber abilities to sling across roofs, making this dense city an excellent location for mastering high-speed movement mechanics. Players will frequently return to this area to gather rare crafting materials and initiate pivotal story missions from local citizens.
In contrast to the industrial design of Steel City, Amber Harbor offers a more traditional maritime atmosphere located on the southern coast. This coastal port serves as a vital entry point for trade and contains numerous hidden chests tucked away near the shipping docks. Exploring the docks early in the campaign helps players accumulate basic upgrading resources while enjoying the scenic ocean views.
Navigating the Formidable Marine Fortresses
The Marine Base located in the northern sector represents one of the most heavily guarded territories on the entire map. Players must adopt a stealthier approach when infiltrating this fortress to avoid triggering massive waves of high-level enemy reinforcements. The multi-layered layout features deep trenches and tall watchtowers that reward players who utilize the Gum-Gum Rocket for vertical mobility.
Another critical military stronghold is the Radio Tower, which controls communications across the entire island network. Capturing this strategic location grants players better visibility over regional collectibles and reveals obscure points of interest on the main interface. Navigating the surrounding fences and security checkpoints requires careful planning and precise combat execution.
Natural Landmarks and Scenic Fields
For players looking to escape the mechanical structures, the Thousand Sunny is permanently docked along a peaceful beachside sanctuary. This iconic pirate ship acts as a central hub where players can interact with the rest of the Straw Hat crew to manage their inventory. Returning to the ship allows you to send crew members on separate resource expeditions to maximize your efficiency.
Crystal Canyon offers a striking visual contrast with its luminous mineral formations and winding underground pathways. Navigating this rocky terrain can be confusing due to the overlapping tunnels, but the rare gemstones found inside make the journey worthwhile. Mastering Luffy's observation haki is essential here to detect hidden treasure chests hidden behind fragile rock formations.
Strategic Tips for Complete Map Exploration
Unlocking fast travel points across the various villages should be a top priority for any player aiming for total completion. Activating these waypoints saves significant time during late-game side quests that require backtracking across multiple regions. Combining fast travel with high-velocity swinging ensures you can cross the island in just a matter of minutes.
Ultimately, fully uncovering the mysteries of the map depends on how effectively you combine exploration with combat upgrades. Upgrading your traversal skills early in the campaign makes reaching distant islands and high mountain peaks far more satisfying. Taking the time to study the map layout ensures a smoother journey from your very first landing to the final boss encounter.

What Is PlayStation Plus Extra And What Does...
Sony reconfigured its console subscription model to offer a tiered experience tailored to different gaming habits and budgets. PlayStation Plus Extra serves as the mid-tier option, sitting comfortably between the baseline Essential package and the premium tier. It provides modern gamers with a highly versatile balance of ongoing online features and a massive library of downloadable software.
The Core Framework of the Mid Tier Plan
Understanding the exact structure of this mid-level plan helps console owners maximize their annual subscription investments. The Extra tier inherently includes every single benefit found in the base Essential tier, meaning you do not sacrifice standard perks. Subscribers maintain full access to online multiplayer lobbies, secure cloud storage for save data, and exclusive digital store discounts.
Additionally, members still receive the standard monthly selection of free downloadable titles that remain tied to their account for the duration of the membership. This foundational tier layout ensures a seamless transition for players looking to upgrade their ecosystem experience. It provides a robust starting point before introducing the massive gameplay expansions that define the tier.
Exploring the Game Catalog Rewards
The primary reason players choose to invest in this specific membership level is the expansive Game Catalog. This feature grants immediate access to hundreds of high-quality PlayStation 4 and PlayStation 5 titles spanning various genres. The library is completely downloadable, ensuring that players experience optimal performance without worrying about internet streaming stability problems.
Sony routinely updates this rotating selection by introducing fresh indie hits alongside massive blockbusters from first-party studios. This extensive array allows enthusiasts to explore massive open-world journeys, competitive sports entries, and narrative-driven adventures. It essentially eliminates the need to buy individual past releases by providing an all-in-one digital vault.
Licensing Details and System Management
Navigating the installation process requires a basic understanding of how digital licenses operate within the modern console ecosystem. When downloading software through the service, make sure to select the correct matching catalog version to avoid system confusion. Users should download the essential version to library, make sure not to download the extra tier one. Because extra tier will overwrite essential tier license of game, potentially causing minor access bugs if your subscription tier changes later.
It is also important to note that these catalog games remain playable only while they reside on the active service list. If a specific publisher removes their title from the rotation, access will lock until you purchase the game independently. Keeping track of monthly departure announcements helps players prioritize finishing their active campaigns before titles leave the platform.
Evaluating the Overall Value Proposition
For the vast majority of console owners, this mid-level tier represents the ideal sweet spot for modern interactive entertainment. It circumvents the higher costs associated with vintage retro streaming while vastly expanding upon basic online connectivity. The sheer variety available ensures that both casual families and hardcore completionists will find consistent entertainment value.
Ultimately, the subscription transforms how you interact with your console by encouraging organic discovery of unfamiliar titles. Investing in this package pays for itself quickly if you download even a handful of blockbuster games throughout the year. It remains a practical, forward-thinking option for anyone looking to build a massive digital library instantly.

Places Of Power In The Witcher 3 Locations...
Finding every Place of Power in The Witcher 3 Wild Hunt is one of the most effective ways to accelerate Geralt's character progression. These ancient stone monoliths grant a temporary percentage boost to a specific magical sign while simultaneously yielding a permanent Ability Point upon their initial discovery. Tracking them down early across the massive open world ensures you can unlock high-tier combat and alchemy skills much faster.
The Initial Stones of White Orchard
The prologue region of White Orchard serves as an excellent starting point for completionists looking to maximize their early potential. There are six unique shrines scattered throughout this war-torn province, covering every available magical sign in the game. Thoroughly clearing this introductory zone provides a massive early boost that will make your subsequent journey through Velen significantly easier.
You can find the local Igni monolith situated directly inside the cemetery grounds located north of the village mill. Another nearby shrine is tucked away deep within the northern forest, surrounded by large rock formations that protect it from plain sight. Exploring these remote locations thoroughly will reward you with enough resources and skill points to face early monsters with confidence.
Navigating the Wilderness of Velen and Novigrad
The expansive, swampy landscapes of Velen and the bustling outskirts of Novigrad contain numerous hidden secrets that require diligent exploration. Many of these monuments are positioned near dangerous monster nests or are guarded by high-level beasts like bears and wraiths. Approaching these monuments requires tactical preparation and careful management of your active combat inventory.
One notable Yrden stone is located on a high cliffside overlooking the southern coast, requiring careful platforming to reach successfully. Another crucial monolith is accessible only during major quest lines involving subterranean cave networks alongside key magical companions. Ensuring you check every question mark on your regional map will guarantee that no hidden ability upgrade is left behind.
Scaling the Mountainous Peaks of Skellige
The rugged islands of Skellige offer a completely different geographical challenge for players seeking out ancient monuments. Due to the vertical nature of the terrain, reaching these monoliths often involves navigating steep mountain paths or using small sailing vessels to reach isolated rocky beaches. The dramatic scenery makes the lengthy travel time incredibly rewarding for dedicated completionists.
A powerful Aard shrine sits near the peak of a prominent mountain ridge on the main island of Ard Skellig. Several other stones are situated inside ancient ruins that feature heavily in late-game narrative choices and regional clan disputes. Taking the time to explore these oceanic territories will finalize your build and prepare Geralt for the final conflicts of the campaign.

Ghost Of Tsushima Shrine Locations Complete Map And...
Exploring the sweeping landscape of Tsushima island offers players an unforgettable open-world experience rich with hidden mystical locations and environmental puzzles. Among the most rewarding secondary targets scattered across the rolling hills are the ancient Shinto shrines, which honor the spiritual forces of nature. Locating every single one of these sanctuaries grants Jin Sakai valuable charms that fundamentally shift combat efficiency and character progression throughout his long journey.
The Core Benefits of Tracking Down Sacred Sites
Reaching the peak of these isolated mountain sanctuaries provides immediate, practical upgrades that enhance your survivability against overwhelming Mongol forces. Each completed platforming challenge rewards you with a major prosperity charm that can modify health regeneration or boost defensive traits. Understanding how these unique items synergize with your current armor set will completely transform your overall approach to difficult regional battles.
Beyond structural bonuses, exploring these hidden domains deepens your connection to the lore and aesthetic design of historical Japan. Worshippers traditionally invite the presence of a kami into their daily routines by honoring these beautifully integrated natural spaces. Navigating the winding mountain paths highlights how carefully the developers constructed the fluid boundary between sacred grounds and the untamed wilderness.
Navigating the Treacherous Path to the Summit
Reaching a hidden sanctuary requires a solid mix of spatial awareness, quick reflexes, and utilizing specialized traversal gear. Players must look for massive vermilion torii gates along the main roads, which explicitly mark the initial threshold of a sacred climbing route. The subsequent path usually involves crossing collapsed bridges, squeezing through narrow rock crevices, and swinging across wide chasms using the grappling hook.
If you lose your footing during a steep ascent, carefully examining the immediate environment will reveal alternative handholds or hidden paths nearby. The tracking layout often uses local wildlife like golden birds to subtly guide confused trackers toward the next logical ledge or interactive rope point. Taking your time during these intense climbing sequences ensures you can systematically conquer the vertical obstacles without falling to your doom.
Understanding Map Indicators and Regional Markers
Uncovering the full checklist of locations requires careful observation of visual clues scattered across the three major regions of the island. While standard maps will not display the exact coordinates immediately, exploring foggy sectors will gradually reveal black ink symbols indicating a nearby point of interest. Speaking with saved peasants at rescued homesteads can also reveal rumors that pinpoint specific mountainside gates across your world map.
Paying attention to environmental shifts like distinct cedar trees, unique water basins, or groups of fluttering butterflies can signal that a hidden boundary is close by. These subtle geographic markers allow dedicated completionists to comfortably navigate the wilderness without relying constantly on the guiding wind mechanic. Clearing every location systematically across Izuhara, Toyotama, and Kamiagata ensures Jin achieves full spiritual readiness before his final tactical confrontations.

Hogwarts Legacy Feldcroft Region Landing Platforms Locations
Exploring the expansive open world of Hogwarts Legacy on a broomstick reveals dozens of hidden environmental challenges designed for completionists. Among these unmarked activities are the various landing platforms scattered across the highlands, which reward players with cosmetic gear once they are activated. Tracking down these structures in the coastal areas requires a sharp eye and a solid understanding of the local geography.
The North Feldcroft Cliffside Platform
The first platform in this rugged southwestern territory is located near the northern border of the region. Players should fly along the jagged cliffs that overlook the sea to spot the colorful target structure resting on a high precipice. Landing exactly in the center of the mechanism will cause the magical flames to ignite, confirming your progress for the exploration challenge log.
This particular location is surrounded by aggressive goblin camps, so approaching from a high altitude is highly recommended for lower-level students. Unlocking this spot brings you one step closer to obtaining the coveted Quidditch Captain cosmetic set. It serves as an excellent starting point before heading deeper into the valley.
The Central Feldcroft Ruins Platform
Another notable structure is situated amidst the dilapidated stone fortifications near the center of the region. The circular pad rests on top of a ruined stone tower that blends seamlessly into the surrounding rocky environment. You will need to steer your broom carefully through the narrow ruins to land safely on the elevated platform.
Many players overlook this specific spot because it is heavily obscured by thick trees and broken masonry from the ancient castle. Scanning the landscape during the daytime makes the bright patterns on the stone surface significantly easier to identify from a distance. Clearing this target ensures your regional map checklist remains fully updated.
The South Feldcroft Coast Platform
The final landing mechanism in this zone is positioned on a massive rock formation overlooking the southwestern shoreline. This platform offers a stunning view of the ocean and is located near a prominent ancient magic hotspot. Flying directly south from the local hamlet will bring you right to this isolated coastal peak.
Because these challenges do not display icons on your main map screen, keeping track of your completed locations is essential for avoiding unnecessary backtracking later. Once you land and activate this final disc, you can comfortably move on to adjacent territories to finish your global collection. Securing these regional points provides a massive boost to your total gameplay completion percentage.

Cyberpunk 2077 Panam Romance Guide Requirements Choices And...
Navigating the complex social dynamics of Night City is one of the most rewarding aspects of Cyberpunk 2077, especially when it comes to forming deep personal connections with key characters. Among the available storylines, pursuing a relationship with the fierce nomad Panam Palmer stands out as a highly detailed narrative arc that requires strategic decision-making. Players who wish to earn her trust must understand the physical preferences and conversational paths necessary to lock in this romance successfully.
Essential Character Requirements for Panam
Before embarking on this quest line, players must ensure their character meets specific physical criteria required by the game mechanics. Panam Palmer is exclusively romanceable by a V who possesses a male body type, though the voice tone selection does not impact her preference. Selecting the correct attributes during character creation ensures that your advances will be reciprocated during critical moments in the Badlands.
Meeting this initial requirement opens the door to her personal narrative arc, which begins during the main story quest titled Ghost Town. It is vital to maintain a supportive attitude from this very first encounter to lay a solid foundation for your future interactions. Building this trust early will influence how she responds to you during later, more intimate side missions.
Critical Dialogue Choices and Side Quests
Securing the bond with Panam involves completing a series of dedicated side quests that become available after finishing the primary narrative objectives. During the mission Riders on the Storm, players must actively defend her choices and take her side during intense arguments with the clan leader, Saul. When seeking shelter from the severe sandstorm, choosing to sit close to her and offering physical comfort will signal your romantic intentions.
The momentum continues into the subsequent assignment, With a Little Help from My Friends, where protecting her secrets is paramount. You must refuse to disclose her plan to Saul when he questions you, as breaking her trust here will permanently lock you out of the relationship. Expressing mutual interest during the quiet conversation on the tower will solidify your standing before the final confrontation.
Completing the Romance Path in the Basilisk
The culmination of this long emotional journey takes place during the late-game side quest known as Queen of the Highway. After successfully restoring the basilisk tank, players will enter a neural synchronization sequence that serves as the ultimate turning point for the relationship. Choosing the intimate option during this shared mental connection will officially trigger the romance sequence and lock in her devotion.
Successfully completing this storyline significantly impacts the concluding chapters of the game, providing unique narrative opportunities for the final acts. Following this path unlocks the support of the Aldecaldos clan, allowing players to pursue one of the most optimistic endings available in the game. Nurturing this connection rewards the player with a loyal companion who stands by V through the toughest challenges in Night City.

Serenade To A Great Fairy Complete Quest Guide
Exploring the vast landscapes of Hyrule in The Legend of Zelda: Tears of the Kingdom brings players face-to-face with numerous open-world threats and rewarding side adventures. Among the most iconic milestones in your journey is restoring power to the mythical guardians who can fortify Link's armor. Completing the Serenade to a Great Fairy quest serves as your essential gateway to these defensive upgrades, transforming how you handle challenging enemy encounters.
Initiating the Musical Investigation
Your journey begins at the Lucky Clover Gazette, located just outside the snowy perimeter of Rito Village in the Hebra region. Speaking with the editor Traysi formally begins the overarching Potential Princess Sightings questline, which places the reporter Penn at various stables across Hyrule. Tracking these rumors eventually directs you to the Woodland Stable in the Eldin region, where the primary musical ensemble is currently stationed.
Upon arriving at the Woodland Stable, you will discover the conductor Mastro and his talented troupe struggling with a broken vehicle. The group needs to reach the nearby fountain but their trusty wagon, Breezer, is missing its wheels and towing harness. Initiating a conversation with the musicians details their exact plight and activates the specific sub-quest required to draw out the Great Fairy Tera.
Repairing the Troupe Wagon
To successfully transport the musicians up the treacherous slope, you must utilize Link's versatile Ultrahand capability to rebuild their transport. Scattered near the stable structure are several loose wooden wheels, building blocks, and relevant tools. Carefully realign the detached wheels to the wagon axles and ensure the chassis sits flat on the ground.
Next, you must locate a wild horse from your registered collection and equip it with a specialized towing harness, which is obtained via stable reward points. Position your horse directly in front of the vehicle and use the Ultrahand ability once more to bind the harness to the front tongue of Breezer. Once everything is securely attached, confirm with Mastro that his musical troupe is ready to embark on the journey.
Escorting the Band to the Fountain
Navigating the path requires steady control as sudden jolts or tipping over will cause the musicians to panic and reset your progress. Slowly guide your horse up the winding trail that leads toward the giant glowing bulb located on the nearby hillside. Avoid aggressive monsters along the roadside to ensure a smooth transition into the final cinematic sequence.
Reaching the summit triggers a charming musical performance that successfully coaxes the Great Fairy out from her protective shelter. This pivotal achievement unlocks basic defensive gear upgrades and paves the way for locating the remaining three sisters across Hyrule. Embracing these early upgrades ensures Link remains well-prepared for the escalating challenges found throughout the dangerous kingdom.

Simpsons Hit And Run Ps2 Cheats Full Cheat...
The Simpsons Hit and Run remains a high-water mark for open-world gaming on the PlayStation 2, beautifully capturing the satirical chaos of Springfield. While exploring the game normally provides an incredible sense of nostalgia, activating hidden developer commands offers an entirely fresh perspective. By inputting specific button sequences, players can completely reshape their chaotic driving experience across the virtual town.
How to Access the Hidden Input Menu
Before executing any commands, you must navigate to the main options screen located within the primary game menu. Once inside this menu, hold down both the L1 and R1 shoulder buttons on your DualShock 2 controller simultaneously. Keeping these buttons pressed down opens the game engine to external button inputs that alter physics parameters.
Successfully entering a command will trigger a unique sound effect, confirming that the mechanical changes are active. This system showcases how early sandbox developers built hidden modifiers directly into their user interfaces for troubleshooting purposes. It ensures that players can instantly experiment with strange gameplay variables without modifying any base saved data.
Altering Physics and Vehicle Mechanics
For drivers looking to defy gravity, holding the shoulder buttons and pressing X, X, X, X creates a dramatic grid setting. This input transforms your chosen vehicle into a weightless projectile that floats high above the Springfield streets whenever you hit a ramp. Adjusting the vertical limits allows for incredible shortcuts across difficult story missions.
Another popular configuration alters the collision properties of everyday traffic by inputting Triangle, Triangle, Square, Square. This modifier gives your vehicle massive kinetic power, sending civilian cars launching into the sky upon the slightest impact. Embracing these mechanics turns standard getaway sequences into highly unpredictable sandbox experiments.
Unlocking Experimental Features and Perspectives
Players eager to document their adventures from unique angles can activate an unmapped cinematic camera setting. By entering Circle, Circle, Circle, X within the options menu, the game removes the standard camera limitations. This feature provides a grander view of the detailed environments and hidden easter eggs scattered throughout the map.
If you prefer to see exact processing variables while exploring, entering Square, Square, Square, Square displays internal calibration figures. Tracking these details offers great insight into how developers optimized the complex simulation for older home hardware. These alternative perspectives keep the beloved retro title engaging even decades after its initial release.

Far Cry 6 Seeds Of Love Mission Guide
Far Cry 6 offers players an expansive open world filled with intense combat and engaging side activities, known collectively as Yaran Stories. One of the most intricate and potentially time-consuming side quests in the game is The Seeds of Love, which focuses on tracking down several characters spread across the region. This comprehensive guide will help you navigate the landscape efficiently to finish the mission without unnecessary backtracking.
Starting the Search in El Este
Before you can begin this specific scavenger hunt, you must first complete the introductory mission titled The First Love for Lorenzo. Once that requirement is fulfilled, Lorenzo will present you with a collection of photographs detailing the general areas where his estranged children are located. Your primary task is to visit these various locations scattered throughout the beautiful yet dangerous province of El Este.
The first child, Felipe, is hiding near the Todos Santos Cemetery, an area shrouded in thick white fog. As you navigate through the gravestones, follow the spooky, disembodied voices until you find him hiding near a small structure. Speaking with him will successfully check the first individual off your extensive list.
Tracking down Targets in Conuco
Moving onward into the Conuco region, you will need to search for Tiago, who is currently trapped inside a locked building in Santo Domingo. To rescue him, climb the roof of the adjacent building and look through the window to shoot the lock off the door. Once the door is opened, enter the room and interact with him to advance the questline further.
Next, head over to the nearby farmlands to find Riel, who is tending to flowers at the Oceguera Farm. When you arrive, interact with the flowers on the table to trigger a sequence of vivid hallucinations that guide your path. Follow the green mist and the spectral figures until they lead you directly to her actual position.
Exploring Sierra Perdida Locations
In the Sierra Perdida area, your search will lead you to a bustling town where Juan is currently taking refuge. He is locked away inside a local clinic, and you must acquire the key from nearby guards to gain entry. Interfacing with the local community will often yield clues regarding which specific soldier holds the objective key.
Another target named Camilo is trapped inside a house surrounded by hostile forces that you must eliminate immediately. Clear out the attacking soldiers outside the residence before attempting to knock on the front door. Once the area is completely secure, he will welcome you inside and acknowledge his father's request.
Completing the Final Deliveries
The remaining children require you to explore coastal regions and small fishing villages along the southern borders of the map. Maricela can be found near a riverbank constructing a campsite, and she requires you to interact with her pet dog to reveal her exact coordinates. Following the canine companion through the forest path ensures you reach her hidden cabin safely.
The final child is located at a high-altitude airstrip, working diligently on maintaining local aviation equipment. Approaching this area requires caution, as military patrols frequently guard the perimeter of the airfield. Once you speak with the final individual, return to the primary camp to report your success to Lorenzo and claim your rewards.

How To Download DLC On Steam
Expanding your favorite PC titles with extra content is one of the best parts of modern gaming. Valve's storefront makes it incredibly convenient to discover, purchase, and install additional stories or cosmetic items for your existing library. Understanding how the client manages these add-ons helps you avoid common installation hurdles and lets you jump straight into the action.
Finding and Purchasing Add-On Content
To begin adding new expansions, you need to visit the specific store page of the base game you already own. Scrolling down the page will reveal a dedicated section that lists all available optional content and expansion packs. From there, you can select the items you want and quickly add them to your digital cart for checkout.
Free expansions can often be claimed instantly by clicking the download button directly on their store page. This action usually prompts the desktop client to launch the base application or queue the file. Once the transaction or claim process is finished, the platform automatically links the licenses to your profile.
Managing Installs in Your Library
After acquiring your new content, navigating to your personal library tab is the next essential step. Right-click the base title from your games list and select the properties option from the context menu. Inside the new window, you will find a dedicated DLC section that displays all the add-ons associated with your account.
This menu features simple checkboxes next to each individual expansion pack or cosmetic bundle. Checking the box ensures that the system registers the item for active use within the game. If you ever need to clear up storage space, unchecking the box will safely remove those specific files without affecting your main save data.
Monitoring Queue Progress and Verifying Files
Steam typically initiates the background retrieval process immediately after a checkbox is successfully toggled. You can monitor the transfer speeds and estimated completion times by clicking on the active downloads bar at the bottom of the client window. If the download does not start on its own, restarting the client application completely will usually force the update sequence.
Sometimes a game will fail to recognize recently acquired expansions due to minor caching issues. To resolve this, you can use the built-in file verification tool located within the local files properties tab. This utility scans your directory to ensure every piece of data is correctly configured and ready to run.

Strategy Games That Improve Problem Solving
Modern video games offer much more than simple entertainment, frequently serving as powerful tools for cognitive enhancement. Engaging in complex digital environments challenges the human brain to process information rapidly and think critically about outcomes. Among various genres, strategy games stand out as exceptionally effective mediums for developing real-world analytical capabilities.
The Cognitive Mechanics of Tactical Play
Strategy games regularly place players in intricate scenarios that require immediate evaluation of resource allocation and spatial limitations. Every move carries measurable consequences, forcing individuals to weigh potential short-term gains against long-term vulnerabilities. This continuous loop of action and feedback naturally trains the mind to approach complicated situations systematically.
As players encounter unpredictable obstacles, they must cultivate advanced analytical thinking skills to formulate successful solutions. This iterative process refines logical reasoning and enhances working memory capacity over extended periods. Consequently, enthusiasts learn to dissect large problems into smaller, manageable components for more efficient resolution.
Enhancing Cognitive Flexibility and Adaptation
Dynamic environments demand that participants modify their established plans whenever an opponent introduces an unexpected tactic. Developing this level of adaptability reinforces cognitive flexibility, allowing individuals to pivot efficiently under extreme pressure. True mastery of the genre involves recognizing when a current framework is failing and swiftly implementing a viable alternative.
To study how elite competitors optimize their decision-making processes under stress, players often access platforms like login situs m88 for valuable interactive data. Reviewing these high-pressure scenarios helps gamers isolate strategic errors and improve their overall operational resilience. Over time, this deliberate practice helps reduce the cognitive cost associated with sudden situational switching.
Long-Term Planning and Resource Control
Behind every triumphant digital campaign lies a strict economic structure that requires constant supervision and balanced execution. Managing multiple production lines while gathering scarce assets prevents critical resource depletion during late-game stages. Players must prioritize sustainable growth over high-risk, temporary advantages that could jeopardize future security.
This strict requirement for forward-thinking translates directly into improved project management competencies in real-life professions. Anticipating future demands while handling current emergencies fosters a highly disciplined mindset suitable for corporate leadership. Ultimately, the economic balancing act found in gaming serves as an excellent simulation for professional operational challenges.
Developing the Analytical Mindset
True problem-solving capabilities culminate in regular post-game reflections and objective assessments of personal performance. Analyzing previous losses allows dedicated individuals to identify recurring logical flaws before entering subsequent matches. This commitment to continuous self-improvement transforms frustrating setbacks into profound educational opportunities.
Through persistence and structured practice, anyone can elevate their cognitive awareness to exceptional levels by playing strategy titles. The structured challenges provided by modern software offer an accessible yet profound space for intellectual development. Embracing these digital puzzles provides lasting cognitive dividends that extend far beyond the virtual screen.

Poker Variants That Reward Creativity
While traditional Texas Hold'em relies heavily on mathematical models and rigid pre-flop charts, other poker disciplines demand a much higher degree of artistic freedom and imagination. Players who enjoy outmaneuvering opponents through unconventional lines often find their skills better rewarded in alternative card formats. These creative variants challenge players to think outside the box, constantly adapting to ever-changing board states and multi-layered card combinations.
The Dynamic Canvas of Open Face Chinese Poker
Open Face Chinese Poker, commonly known as OFC, completely removes the element of traditional betting rounds and instead focuses entirely on card placement and structural planning. Players must construct three distinct hands simultaneously on a multi-tiered board while their cards are dealt face-up one by one. This highly transparent format forces you to constantly evaluate risk versus reward as you attempt to build stronger combinations than your opponent without fouling your own hand.
The introduction of the Pineapple variant further amplifies this creative freedom by dealing players three cards instead of one, allowing them to discard one card and keep two. This unique mechanic rewards players who can visualize multiple potential hand paths and pivot their strategy mid-game based on the cards remaining in the deck. To find engaging tables and test your spatial reasoning in modern digital formats, you can explore various options via a trusted portal like login situs m88 to enhance your experience.
Navigating the Complexity of Mixed Game Formats
Mixed games like H.O.R.S.E. or 8-Game Mix require players to rotate through entirely different poker disciplines after a set number of hands. This constant transition prevents anyone from relying on a single, rigid game plan and forces rapid cognitive adjustments throughout the session. A creative player can easily exploit opponents who excel in one popular variant but struggle to find their footing in another less common game.
Success in mixed games ultimately comes down to understanding how different hand values and betting structures influence player psychology across various formats. By paint-brushing a broader picture of the table dynamics, imaginative players can execute highly unusual bluffs that would not make sense in a single-game environment. This exceptional versatility makes mixed rotation formats the ultimate playground for well-rounded card enthusiasts seeking a deep strategic challenge.
The Art of Deception in Lowball Variants
Lowball games such as Deuce-to-Seven Triple Draw completely flip traditional hand rankings on their head by making the lowest possible hand the winner. With no community cards displayed on the board, players must rely purely on the drawing phases and betting patterns to deduce what their opponents are holding. This lack of public information opens up massive opportunities for deceptive play and creative storytelling through your betting actions.
Snowing, which is the bold act of standing pat with a completely worthless hand to represent a perfect low, is one of the most artistic bluffs in card gaming history. Executing this difficult move successfully requires an intimate understanding of your opponent's folding tendencies and flawless timing. In these reverse-ranking formats, psychological warfare and pure imagination often triumph over simple mathematical calculations.